
In this book, you learn about using Android development tools, creating user interfaces, and getting information over a network to create fun and interesting apps. Learning Android development certainly means the ability to create an app that runs on an Android device such as a phone or a tablet. It also means understanding how different parts of the Android platform work together. In this chapter, you learn about core features of the Android platform and how they interact.
This hour lays the foundation for what you learn throughout the rest of this book. You can begin by thinking about what Android is.
On one level, Android is an operating system (OS) that runs on phones, tablets, and other devices (such as TVs). A device manufacturer has the job of installing the Android OS on their devices.
The Android OS includes the set of features that the user sees and interacts with. When Android adds new features for the camera, a new visual design, or a new way for the user to unlock the phone, those features are in the OS.
Android includes a powerful development environment that enables developers, like you, to create apps that run on Android devices. You have access to Android-specific classes in the Android framework.
In the past, the primary tool for Android development was the Eclipse, but the latest tool for Android development is known as Android Studio. This book uses Android Studio for examples. The Android concepts are the same regardless of the integrated development environment (IDE) you choose. You learn more about Android Studio later in this chapter. Figure 1.1 shows the project-creation process in Android Studio. You can choose an Android version as your target version.
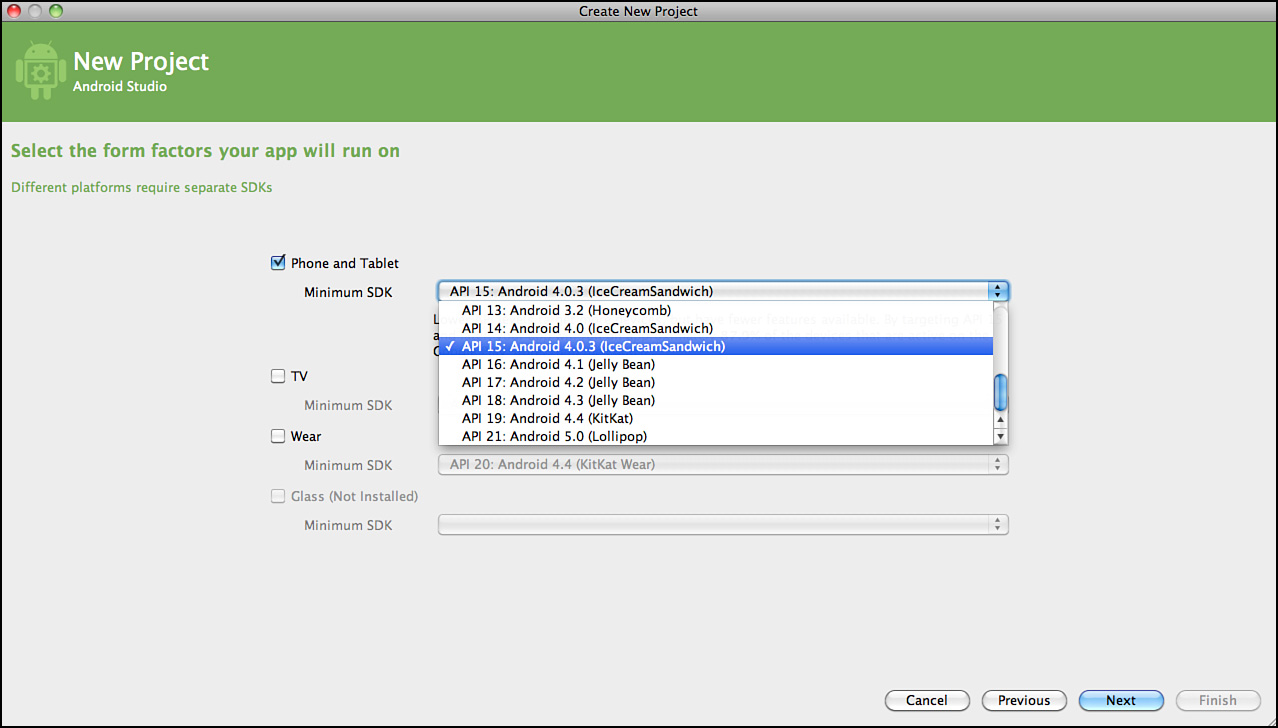
FIGURE 1.1 Setting up a project in Android Studio.
Note: What Is Lollipop?
The current version of Android is called Lollipop. It is also known as Android 5.0. Each version of Android includes an application programming interface (API) level that refers to the developer features that were introduced in that release. Lollipop has API level 21. Earlier versions of Android were also named for desserts, including Cupcake, Donut, Eclair, Froyo, Gingerbread, Ice Cream, and KitKat. You can learn more about Lollipop at http://developer.android.com/about/versions/lollipop.html. Android M has been announced as the next version of Android. Android M will focus on performance
Android is a mobile platform. Being an OS with a development environment that gives access to OS features makes Android a platform. A marketplace to sell apps completes the picture.
Android is a big deal!
As a developer, you learn about using Android development tools and how to create apps.
This section’s goal is for you to understand some basic things about what is happening when an Android app runs.
Four things in the Android framework can help you understand how Android works and what is going on in an Android app. This is not an exhaustive list of everything important in Android, but it is enough for you to consider what is happening when an Android app runs.
The following four things can help you understand the “big picture” for Android:
ActivitiesIntentsIntentServicesBroadcastReceiversAn Activity(android.app.Activity) is a core component of the Android platform. An activity is typically associated with a screen in the application. That means that most activities start and then show a user interface.
When an Android app launches, some activity must be launched. This launch activity is specified as the entry point to the app.
The launch activity is specified in the Android manifest file.
Note: The Android Manifest File
The Android manifest file, AndroidManifest.xml, is the central configuration file for an Android application. It includes things such as the name of the application, the icon for the application, and a set of permissions that the application requires. Each activity in the app must be defined in the manifest file.
You can create an app that uses one Activity or many. For apps that have more than one activity, each must be defined in the manifest. The launch activity is often used to start other activities.
The most common way to start one activity from another is to use the startActivity() method. The startActivity() method is passed an Intent as a parameter.
An Intent(android.content.Intent) is used to make a request to the Android operating system. An Intent contains all the information needed by the Android OS to start a task. When you want to start an Activity, you must create an Intent that specifies that Activity.
When the startActivity() method is called with the intent parameter, the Android system matches the intent action with the appropriate activity on the Android system. That activity is then launched.
One job of the Android OS is to associate intents with actions. An Intent can be specific, such as a request for a specific activity to be launched, or an Intent can be less specific and request that any activity that matches certain criteria be launched. A specific Intent is known as an explicit Intent and a less-specific Intent is known as an implicit Intent. With an implicit Intent, the OS presents a list of applications that can handle the task.
Intents can pass data between activities. You can use an Intent in this way by including additional data, called extras, within the Intent.
To package extra pieces of data along with an intent, you use the putExtra() method with the appropriate type of object you want to include.
A service in Android is a task that runs independently of an activity. A Service(android.app.Service) can be launched from an activity and work in the background. That means while the user is interacting with the user interface of an Activity, a Service can be running in the background and doing work. When an Activity updates, the user interface that work is occurring on is the UI thread. For efficient and responsive apps, use background processing and move work off of the UI thread.
An IntentService(android.app.IntentService) provides a convenient and simple way to implement a service. Like an Activity, an IntentService must be defined in the manifest file. An Intent is launched with a call to startService() with a parameter that is the Intent associated with the IntentService.
A service runs independently of an Activity, but often an Activity should be notified when a service completes. An IntentService can send a broadcast when it completes. By now, you might not be surprised to learn that when the IntentService sends a broadcast, it uses an Intent as the parameter. The IntentService calls the sendBroadcast() method with an intent as a parameter.
A BroadcastReceiver(android.content.BroadcastReceiver) receives an intent from the sendBroadcast() method. The broadcast receiver acts on the intent.
Together intent services and broadcast receivers can be considered a “publish and subscribe” system. The intent service publishes that some event has occurred, and the broadcast receiver is subscribed to the event. One job of the broadcast receiver is to determine whether it should handle the event. It does that by checking the contents of the intent. The broadcast receiver determines whether it should act on the action supplied by the intent.
Both activities and services are tasks that run within an Android app. Android developers often write code that makes things happen in an activity or service. You’ve also learned that intents are used to make things happen on Android. Intents are used to launch both an Activity and an IntentService.
BroadcastReceivers listen for intents and act on them. A broadcast receiver is often associated with a specific intent service.
One way to bring these ideas together is to consider what is going on in Android when you look at a web page in the Chrome app and decide to share it.
You know that apps launch an activity when they start, so the Chrome app starts by launching an activity. As you browse web pages, you have the option to share a page, as shown in Figure 1.2.

FIGURE 1.2 Share a web page from the Chrome app.
When you decide to share a web page, a list of apps that are capable of sharing a web page appears, as shown in Figure 1.3. How do you think that might happen?
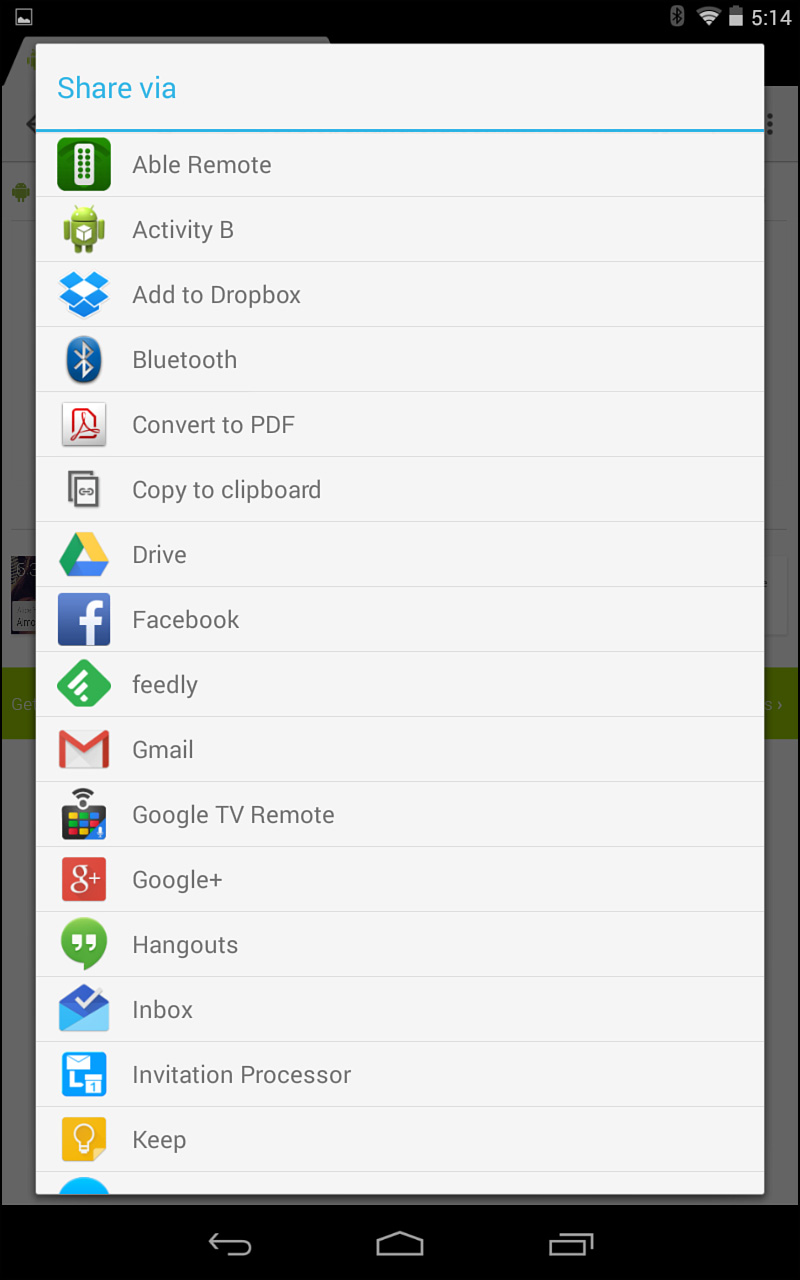
FIGURE 1.3 List of apps that can share a web page.
The Chrome app is sending an intent to share web page URL. Any app that has a broadcast receiver that handles a web page URL is shown to the user by the Android system. (In Hour 2, “Understanding Intents,” you make an app that adds itself to that list.)
In Android, activities, intents, intent services, and broadcast receivers are all specific classes defined in the Android framework. From this point on, when a new class is introduced in this book, the full class name is provided. Classes are included in packages.
For example, the Activity class (android.app.Activity) is in the android.app package.
Tip: Using Android Online Documentation
Each class that is available for you to use as an Android developer is documented online on the http://developer.android.com site. For example, the Activity class is documented at http://developer.android.com/reference/android/app/Activity.html. The documentation is organized by package name.
Classes include fields that are properties of the class, and methods that are operations that the class can perform. You commonly override the methods of a class to specify what you want your implementation of the class to do.
An Activity includes the method onCreate(). It is in the onCreate() method that you specify what should be done when your activity is created.
An Intent(android.content.Intent) defines an action to be taken and the data needed for that action to occur. The constructor that defines an Intent often contains both the action and the data. Let’s look at some examples for defining intents in code.
The following code defines an intent that launches an activity name HelpActivity. The putExtra() method in this code adds an additional piece of data to the Intent. Note that by convention the package name for the application is used as part of the name for the extra data:
Intent intent = new Intent(getApplicationContext(), HelpActivity.class);
intent.putExtra("com.example.LEVEL", 23);
startActivity(intent);
When the HelpActivity class launches, the getIntent() method can be used to retrieve the intent. Then the extra information can be extracted and used. That code looks like this:
Intent receiveIntent = getIntent();
int helpLevel=receiveIntent.getIntExtra("com.example.LEVEL", 1);
The parameters to the getIntExtra() method are the name of the parameter and a default value.
In addition, after an Intent is defined, extra data can be added with the putExtra() method.
An IntentService(android.app.IntentService) includes the onHandleIntent() method that is called to process the request. It is passed an Intent as a parameter to decide what to do. It is where the work associated with the Intent is done.
A BroadcastReceiver(android.content.BroadcastReceiver) has an onReceive() method that is called when the BroadcastReceiver receives an intent broadcast. When a task associated with the Intent needs to be performed, it is done in the onReceive() method.
Much of the functionality in an Android app takes place in activities and services. An IntentService is a specific type of Service(android.app.Service). A service is a long-running operation that does not require user interaction. Intents are used to start both services and activities. A broadcast receiver is started when either an activity or service sends an intent via the sendBroadcast() method.
When you begin creating apps, you can focus on adding functionality to activities. As your app gets more sophisticated and does things like retrieve data from the network, you will find more of a need to use services.
An Application(android.app.Application) is an object that can be used for maintaining global application state. When we define activities and services within the manifest file, they are defined as part of the application.
Both the Application class and Activity class are extended from the Context(android.content.Context) class. The Context class contains global information about an application environment. In later chapters, you learn about application properties; those are accessed via a Context. Contexts are used to start activities and services. Because an activity is a Context, it can launch other activities.
You can retrieve the application context for the current process by using the getApplicationContext() method, like this:
Context context = getApplicationContext();
Because the Activity class derives from the Context class, you can use the Activity object instead of retrieving the application context explicitly when you’re writing code inside your Activity class.
After you have retrieved a valid application context, you can use it to access application-wide features and services.
Android Studio is an IDE for Android development. It includes an environment for developing code and a visual environment for creating user interfaces for your apps.
You can find the online documentation for installing Android Studio at http://developer.android.com/sdk/installing/studio.html. Download the complete Android Studio package and follow the installation instructions. You will have a development environment that includes the following:
When you start Android Studio, several options are presented. Choose to create a new project. You are asked to name your application and to enter a company domain. If you have a domain name that you plan on using for your development, you can enter it. If you intend to sell apps on the Google Play market or other Android app stores, the package name is very important. It is a way to uniquely identify your apps.
Choose the SDK that supports Phone and Tablet apps. The other options are Wear and TV apps. You can set the minimum SDK to API 14: Android 4.0 (IceCreamSandwich).
Choose to add a blank activity, as shown in Figure 1.4.
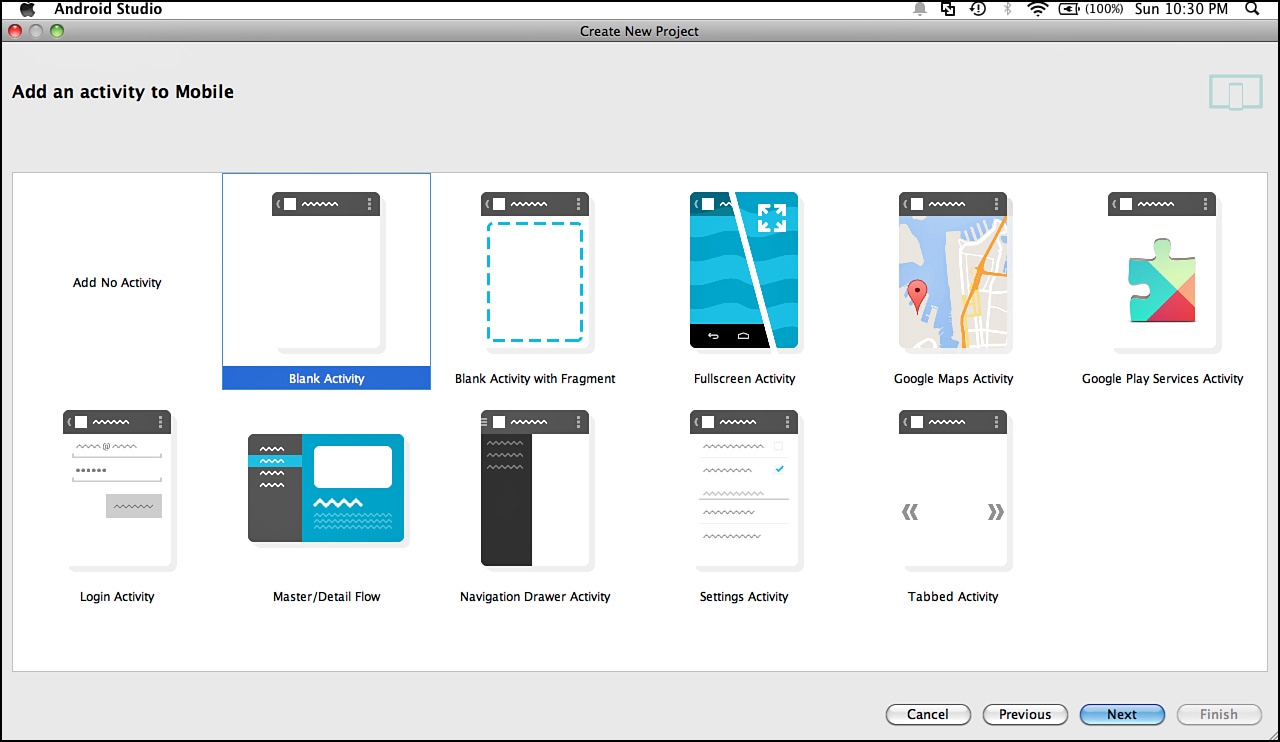
FIGURE 1.4 Add a blank activity.
You are asked to name your activity. You can leave the default of MainActivity.
Android Studio now creates your project.
Your goal is to install Android Studio and to understand some of the basics of the user interface. There is no need to add new code or to change the user interface at this point. This is a good opportunity to understand where the code is in the project and to take a close look at the manifest file.
Video 1.2—Create a New Project
1. Choose the Java folder.
2. Select the name for the package that you created.
3. Open the Java code for the activity. The result should look like Figure 1.5.
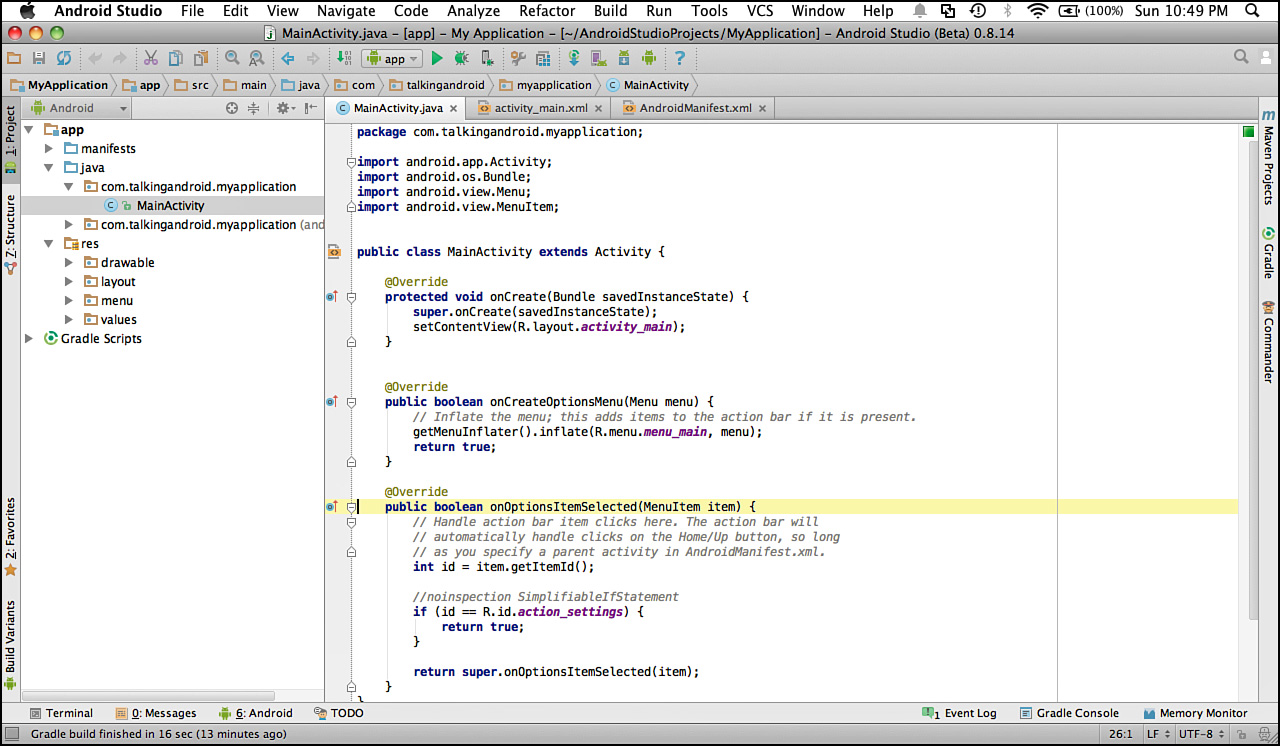
FIGURE 1.5 Viewing code for an Activity in Android Studio.
4. Choose the Manifests folder.
5. Open the AndroidManifest.xml file (see Listing 1.1).
LISTING 1.1 AndroidManifest.xml
 1:  <?xml version="1.0" encoding="utf-8"?>
 2:  <manifest xmlns:android="http://schemas.android.com/apk/res/android"
 3:      package="com.talkingandroid.myapplication" >
 4:      <application
 5:         android:allowBackup="true"
 6:         android:icon="@drawable/ic_launcher"
 7:         android:label="@string/app_name"
 8:         android:theme="@style/AppTheme" >
 9:       <activity
10:           android:name="com.talkingandroid.myapplication.MainActivity"
11:           android:label="@string/app_name" >
12:           <intent-filter>
13:              <action android:name="android.intent.action.MAIN" />
14:              <category android:name="android.intent.category.LAUNCHER" />
15:           </intent-filter>
16:        </activity>
17:     </application>
18:  </manifest>
Android is a popular OS and platform. This chapter introduced you to Android and explained what occurs when an Android application is running. You learned that activities and services perform operations in Android and that intents are used to pass data and initiate tasks. Intent services and broadcast receivers can be considered to be a simple “publish and subscribe” system within Android. Intents are always being passed around in Android. Though your initial focus will be on activities and the user interface associated with application development, these concepts should help your overall understanding of Android; you revisit them in detail in subsequent chapters.
This chapter also introduced Android Studio, and you learned how to create an activity with a new project.
Q. Must I use Android Studio for Android development?
A. No, Android Studio is the focus of the Android Tools Team, and new development is occurring on that platform. Eclipse has been used for Android development in the past. The direction is to move from Eclipse to Android Studio.
Q. Should I develop for Lollipop?
A. As you saw when you created a new project in Android Studio, you can specify a minimum SDK to support. For certain development, such as Android Wear and Android TV development, you must use Lollipop. For phones and tablets, it might make sense to use the latest SDK but support a lower SDK version. The particulars of your app drive this decision.
For this chapter, make sure that you installed Android Studio and created a simple project. Explore the Java code for the activity that you created.