
The modern Web has little to do with its original, text-only ancestor. Modern web pages can involve audio, video, animated graphics, interactive navigation, and much more—and more often than not, JavaScript plays a big part in making it all possible.
In this first hour we describe what JavaScript is, briefly review the language’s origins, and consider the kinds of things it can do to improve your web pages. You also dive right in and write some working JavaScript code.
Given that you’ve picked up this book, there’s a pretty good chance that you’re already familiar with using the World Wide Web and have at least a basic understanding of writing web pages in some variant of HTML.
HTML is not a programming language but (as the name indicates) a markup language; we can use it to mark parts of our page to indicate to the browser that these parts should be shown in a particular way—bold or italic text, for instance, or as a heading, a list of bullet points, arranged as a table of data, or using many other markup options.
Once written, these pages by their nature are static. They can’t respond to user actions, make decisions, or modify the display of their page elements. The markup they contain will always be interpreted and displayed in the same way whenever the page is visited by a user.
As you know from using the World Wide Web, websites can do much more; the pages we routinely visit are often far from static. They can contain “live” data, such as share prices or flight arrival times, animated displays with changing colors and fonts, or interactive capabilities such as the ability to click through a gallery of photographs or sort a column of data.
These clever capabilities are provided to the user by programs—often known as scripts—operating behind the scenes to manipulate what’s displayed in the browser.
Note
The term script has no doubt been borrowed from the world of theater and TV, where the script defines the actions of the presenters or performers. In the case of a web page, the protagonists are the elements on the page, with a script provided by a scripting language such as, in this case, JavaScript. Program and script are, for our purposes, pretty much interchangeable terms, as are programming and scripting. You’ll find all of these used in the course of the book.
There are two fundamental ways of adding scripts to otherwise static web content:
Note
There is, in fact, an elegant way to incorporate output from server-side scripts into your client-side JavaScript programs. We look at this in Part IV of this book, when we study a technique called Ajax.
This book is all about JavaScript, the most-used language for client-side scripting on the Internet.
Note
Although the names are similar, JavaScript doesn’t have much, if anything, to do with the Java language developed by Sun Microsystems. The two languages share some aspects of syntax, but no more so than either of them do with a whole host of other programming languages.
A program written in JavaScript can access the elements of a web page, and the browser window in which it is running, and perform actions on those elements, as well as creating new page elements. A few examples of JavaScript’s capabilities include
Because JavaScript code runs locally inside the user’s browser, the page tends to respond quickly to JavaScript instructions, enhancing the user’s experience and making the application seem more like one of the computer’s native applications rather than simply a web page. Also, JavaScript can detect and utilize certain user actions that HTML can’t, such as individual mouse clicks and keyboard actions.
Virtually every web browser in common use has support for JavaScript.
The ancestry of JavaScript dates back to the mid-1990s, when version 1.0 was introduced for Netscape Navigator 2.
The European Computer Manufacturers Association (ECMA) became involved, defining ECMAScript, the great-granddaddy of the current language. At the same time, Microsoft introduced jScript, its own version of the language, for use in its Internet Explorer range of browsers.
Note
JavaScript is not the only client-side scripting language. Microsoft browsers have supported (in addition to jScript, Microsoft’s version of JavaScript) a scripting-oriented version of the company’s own Visual Basic language, called VBScript.
JavaScript, however, has much better browser support; a version of JavaScript is supported by nearly every modern browser.
In the late 1990s, Netscape Navigator 4 and Internet Explorer 4 both claimed to offer major improvements over earlier browser versions in terms of what could be achieved with JavaScript.
Unfortunately, the two sets of developers had gone in separate directions, each defining its own additions to the JavaScript language and how it interacted with your web page.
Note
The World Wide Web Consortium (W3C) is an international community that exists to develop open standards to support the long-term growth of the World Wide Web. Its website at http://www.w3.org/ is a vast resource of information and tools relating to web standards.
This ludicrous situation forced developers to essentially write two versions of each of their scripts and use some clumsy and often error-prone routines to try to determine which browser was being used to view the page and subsequently switching to the most appropriate version of their JavaScript code.
Thankfully, the World Wide Web Consortium (the W3C) worked hard with the individual browser manufacturers to standardize the way web pages were constructed and manipulated, by means of the Document Object Model or DOM. Level 1 of the new standardized DOM was completed in late 1998, and Level 2 in late 2000.
Don’t worry if you’re not sure what the DOM is or what it does—you learn a lot about it later this hour and through the course of this book.
Whenever the page is requested by a user, any JavaScript programs it contains are passed to the browser along with page content.
You can include JavaScript statements directly into your HTML code by placing them between <script> and </script> tags within the HTML:
<script>

    ... JavaScript statements ...

</script>
Note
JavaScript is an interpreted language, rather than a compiled language such as C++ or Java. The JavaScript instructions are passed to the browser as plain text and are interpreted sequentially; they do not need to first be “compiled” into condensed machine code only readable by the computer’s processor. This offers big advantages in that JavaScript programs are easy to read, can be edited swiftly, and their operation can be retested simply by reloading the web page in the browser.
The examples in this book are all written to validate correctly as HTML5, in which no obligatory attributes are specified for the <script> element (the type attribute is optional in HTML5 and has been excluded from the examples in this book to aid clarity). However, if you write JavaScript for inclusion in HTML 4.x or XHTML pages, you should add the type attribute to your <script> elements:
<script type="text/javascript">

    ... JavaScript statements ...

</script>
You’ll also occasionally see <script> elements having the attribute language="JavaScript". This has long been deprecated, so unless you think you need to support ancient browsers such as Navigator and Mosaic, there’s no need to continue writing code like this.
The examples in this hour place their JavaScript code within the body section of the document, but JavaScript code can appear elsewhere in the document too; you can also use the <script> element to load JavaScript code saved in an external file. We be discussing in much more detail how to include JavaScript in your pages in Hour 2, “Writing Simple Scripts.”
Note
The term deprecated is applied to software features or practices to indicate that they are best avoided, usually because they have been superseded.
Although still supported to provide backward compatibility, their deprecated status often implies that such features will be removed in the near future.
A Document Object Model or DOM is a conceptual way of visualizing a document and its contents.
Each time your browser is asked to load and display a page, it needs to interpret (we usually use the word “parse”) the source code contained in the HTML file comprising the page. As part of this parsing process, the browser creates a type of internal model known as a DOM representation based on the content of the loaded document. It is this model that the browser then refers to when rendering the visible page. You can use JavaScript to access and edit the various parts of the DOM representation, at the same time changing the way the user sees and interacts with the page in view.
In the early days, JavaScript provided rather primitive access to certain parts of a web page. JavaScript programs could gain access, for example, to the images and forms contained in a web page; a JavaScript program could contain statements to select “the second form on the page” or “the form called ‘registration.’”
Web developers sometimes refer to this as DOM Level 0, in backward-compatible homage to the W3C’s subsequent Level 1 DOM definition. As well as DOM Level 0, you might also see reference to the BOM, or Browser Object Model. Since DOM Level 0, the W3C has gradually extended and improved the DOM specification. The W3C’s much more ambitious definition has produced a DOM that is valid not just for web pages and JavaScript, but for any programming language and for XML, in addition to HTML, documents.
Note
In this book, we concentrate on the W3C’s DOM Levels 1 and 2 DOM definitions. If you’re interested in the details of the various DOM levels, you can find a good overview at https://developer.mozilla.org/en/DOM_Levels.
The browser vendors have incorporated much-improved support for DOM in their most recent versions. At the time of writing, Internet Explorer is shipping in version 9, Netscape Navigator has been reborn as Mozilla Firefox (currently in version 9), and other competitors in the market include Opera, Konqueror, Apple’s Safari, and Google’s Chrome and Chromium. All of these offer excellent support for the DOM.
The situation has improved markedly for web developers. Apart from a few irritating quirks, we can now largely forget about writing special code for individual browsers provided that we follow the DOM standards.
Note
The use of early browsers such as Netscape Navigator (any version) and Internet Explorer up to version 5.5 has now virtually disappeared. This book concentrates on more modern browsers that are compatible with DOM Level 1 or better, such as Internet Explorer 7+, Firefox, Google Chrome, Apple Safari, Opera, and Konqueror. You are recommended to upgrade your browser to the latest stable version.
Each time your browser loads and displays a page, it creates in memory an internal representation of the page and all its elements, the Document Object Model or DOM. In the DOM, elements of your web page have a logical, hierarchical structure, like a tree of interconnected parent and child objects. These objects, and their interconnections, form a conceptual model of the web page and the browser that contains and displays it. Each object also has a list of properties that describe it and a number of methods we can use to manipulate those properties using JavaScript.
Right at the top of the hierarchical tree is the browser window object. This object is a parent or ancestor to everything else in the DOM representation of your page.
The window object has various child objects, some of which are visualized in Figure 1.1. The first child object shown in Figure 1.1, and the one we’ll use most in this book, is the document object. Any HTML page loaded into the browser creates a document object containing all of the HTML and other resources that go to make up the displayed page. All of this information is accessible via JavaScript as a parent-child hierarchy of objects, each with its own properties and methods.
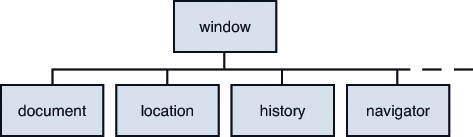
Figure 1.1. The window object and some of its children
Tip
This notation can be extended as many times as necessary to represent any object in the tree. For example
object1.object2.object3
represents object3, whose parent is object2, which is itself a child of object1.
The other children of the window object visible in Figure 1.1 are the location object (containing details of the URL of the currently loaded page), the history object (containing details of the browser’s previously visited pages), and the navigator object (which stores details of the browser type, version, and capabilities). We look in detail at these objects in Hour 4, “DOM Objects and Built-In Objects,” and using them again at intervals throughout the book, but for now let’s concentrate on the document object.
Note
Don’t worry if object hierarchy and dot notation don’t seem too clear right now. You’ll be seeing many examples in the course of the book!
The notation we use to represent objects within the tree uses the dot or period:
parent.child
As an example, referring to Figure 1.1, the location object is a child of the window object, so in the DOM it is referred to like this:
window.document
The <body> section of your HTML page is represented in the DOM as a child element of the document object; we would access it like this:
window.document.body
Tip
The window object always contains the current browser window, so you can refer to window.document to access the current document. As a shortcut, you can also simply use document instead of window.document—this also refers to the current window.
If you have several windows open, or if you are using a frameset, there will be a separate window and document object for each window or frame. To refer to one of these documents, you need to use the relevant window name and document name belonging to the window or frame in question.
The last item in the sequence can also be, instead of another object, a property or method of the parent object:
object1.object2.property

object1.object2.method
For example, let’s suppose that we want to access the title property of the current document, as specified by the HTML <title>...</title> tags. We can simply use
window.document.title
Let’s take a look at some of the methods associated with the window and document objects. We begin with two methods, each of which provides a means to talk to the user.
Even if you don’t realize it, you’ve seen the results of the window object’s alert method on many occasions. The window object, you’ll recall, is at the top of the DOM hierarchy, and represents the browser window that’s displaying your page. When you call the alert() method, the browser pops open a dialog displaying your message, along with an OK button. Here’s an example:
Tip
In practice, you can leave out the window. part of the statement. Because the window object is the top of the DOM hierarchy (it’s sometimes referred to as the global object), any methods called without direct reference to their parent object are assumed to belong to window. So
<script>alert("Here is my message");</script>
works just as well.
<script>window.alert("Here is my message");</script>
This is our first working example of the dot notation. Here we are calling the alert() method of the window object, so our object.method notation becomes window.alert.
Notice that the line of text inside the parentheses is contained within quotation marks. These can be single or double quotes, but they must be there, or an error will be produced.
This line of code, when executed in the browser, pops up a dialog like the one in Figure 1.2
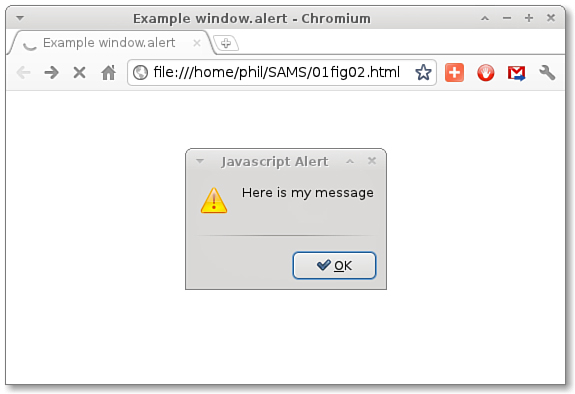
Figure 1.2. A window.alert() dialog
Tip
Figure 1.2 shows the alert generated by the Chromium browser running on Ubuntu Linux. The appearance of the dialog box changes in detail depending on the particular browser, operating system, and display options you are using, but it always contains the message along with a single OK button.
You can probably guess what the write method of the document object does, simply from its name. This method, instead of popping up a dialog, writes characters directly into the HTML of the document, as shown in Figure 1.3.
<script>document.write("Here is another message");</script>
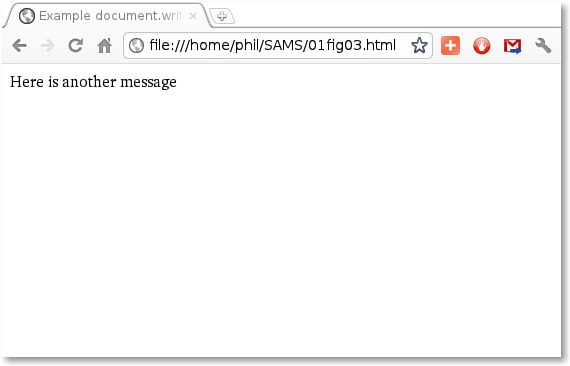
Figure 1.3. Using document.write()
Video 1.1—Try It Yourself: “Hello World!” in JavaScript
Listing 1.1. “Hello World!” in an alert() Dialog
Note
In fact, document.write is a pretty dumb way to write content to the page—it has a lot of limitations, both in terms of its function and in terms of coding style and maintainability. It has largely fallen into disuse for “serious” JavaScript programming. By the time you come to write more advanced JavaScript programs, you’ll have learned much better ways to put content into your pages using JavaScript and the DOM. However, we use document.write quite a lot during Part I of the book, while you come to grips with some of the basic principles of the language.
Tip
Until the user clicks OK, he is prevented from doing anything else with the page. A dialog that behaves this way is known as a modal dialog.
Reading a Property of the document Object
Caution
Some text editor programs might try to add a .txt extension to the filename you specify. Be sure your saved file has the extension .html or the browser will probably not open it correctly.
alert(document.title);
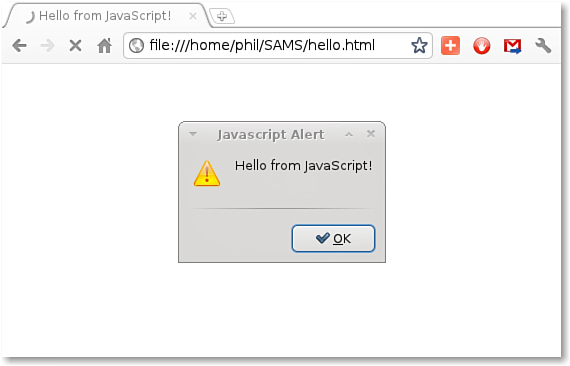
Figure 1.4. Displaying a property of the document object
Caution
The default security settings in some browsers cause them to show a security warning when they are asked to open local content, such as a file on your own computer. If your browser does this, just choose the option that allows the content to be shown.
In this hour, you were introduced to the concepts of server-side and client-side scripting and had a brief history lesson about JavaScript and the Document Object Model. You had an overview of the sorts of things JavaScript can do to enhance your web pages and improve the experience for your users.
Additionally, you learned about the basic structure of the Document Object Model and how JavaScript can access particular objects and their properties, and use the methods belonging to those objects.
In the lessons that follow, we build on these fundamental concepts to carry out more advanced scripting projects.
Q. If I use server-side scripting (in a language such as PHP or ASP), can I still use JavaScript on the client side?
A. Most definitely. In fact, the combination of server-side and client-side scripting provides a potent platform, capable of producing powerful applications. Google Mail is a good example.
Q. How many different browsers should I test in?
A. As many as you practically can. Writing standards-compliant code that avoids browser-specific features will go a long way toward making your code run smoothly in different browsers. However, one or two minor differences between browser implementations of certain features are likely to always exist.
Q. Won’t the inclusion of JavaScript code slow down the load time of my pages?
A. Yes, though usually the difference is small enough not to be noticeable. If you have a particularly large piece of JavaScript code, you may feel it’s worthwhile testing your page on the slowest connection a user is likely to have. Except for in extreme circumstances, it’s unlikely to be a serious issue.
In the “Try It Yourself” section of this hour, we used the line
alert(document.title);
to output the title property of the document object. Try rewriting that script to instead output the document.lastModified property, which contains the date and time that the web page was last changed. (Be careful—property names are case sensitive. Note the capital M.) See whether you can then modify the code to use document.write() in place of alert(), to write the property directly into the page like in Figure 1.3.
Try the example code from this hour in as many different browsers as you have access to. What differences do you note in how the example pages are displayed?