
In the first hour, you got a basic idea of the process behind creating web content and viewing it online (or locally, if you do not yet have a web hosting provider). In this hour, we get down to the business of explaining the various elements that must appear in an HTML file so that it is displayed appropriately in your web browser.
In general, this hour provides a quick summary of HTML basics and gives some practical tips to help you make the most of your time as a web page author and publisher. It’s not all theory, however; you do get to see a real web page and the HTML markup behind it.
Here’s a review of what you need to do before you’re ready to use the rest of this book:
Caution
Although all web browsers process and handle information in the same general way, some specific differences among them mean that things do not always looking the same in different browsers. Be sure to check your web pages in multiple browsers to make sure that they look reasonably consistent.
Note
As discussed in the first hour, if you plan to put your web content on the Internet (as opposed to publishing it on CD-ROM or a local intranet), you need to transfer it to a computer that is connected to the Internet 24 hours a day. The same company or school that provides you with Internet access might also provide web space; if not, you might need to pay a hosting provider for the service.
In the first hour, you learned that a web page is just a text file that is marked up by (or surrounded by) HTML codes that tell the browser how to display the text. To create these text files, use a text editor such as Notepad (on Windows) or TextEdit (on a Mac)—do not use WordPad, Microsoft Word, or other full-featured word-processing software because those create different sorts of files than the plain-text files we use for web content.
Before you begin working, you should start with some text that you want to put on a web page:
As you go through this hour, you will add HTML markup (called tags) to the text file, thus making it into web content.
When you save files containing HTML tags, always give them a name ending in .html. This is important: If you forget to type the .html at the end of the filename when you save the file, most text editors give it some other extension (such as .txt). If that happens, you might not be able to find the file when you try to look at it with a web browser; if you find it, it certainly won’t display properly. In other words, web browsers expect a web page file to have a file extension of .html and to be in plain-text format.
When visiting websites, you might also encounter pages with a file extension of .htm, which is another acceptable file extension to use. You might find other file extensions used on the web, such as .jsp (Java Server Pages), .asp (Microsoft Active Server Pages), or .php (PHP: Hypertext Preprocessor), but these file types use server-side technologies that are beyond the scope of HTML and the lessons throughout this book. However, these files also contain HTML in addition to the programming language; although the programming code in those files is compiled on the server side and all you would see on the client side is the HTML output, if you looked at the source files, you would likely see some intricate weaving of programming and markup codes.
Listing 2.1 shows an example of text you can type and save to create a simple HTML page. If you opened this file with Chrome, you would see the page shown in Figure 2.1. Every web page you create must include a <!DOCTYPE> declaration, as well as <html></html>, <head></head>, <title></title>, and <body></body> tag pairs.
LISTING 2.1 The <html>, <head>, <title>, and <body> Tags
Caution
We reiterate this point because it is very important to both the outcome and the learning process itself: Do not create your first HTML file with Microsoft Word or any other HTML-compatible word processor; most of these programs attempt to rewrite your HTML for you in strange ways, potentially leaving you totally confused. The same holds true when you use Microsoft Word and “Save As” HTML—you are likely to get a verbose and noncompliant file full of HTML that will not validate and will cause you headaches to edit.
Additionally, I recommend that you not use a graphical, what-you-see-is-what-you-get (WYSIWYG) editor, such as Adobe Dreamweaver. You’ll likely find it easier and more educational to start with a simple text editor while you’re just learning HTML.
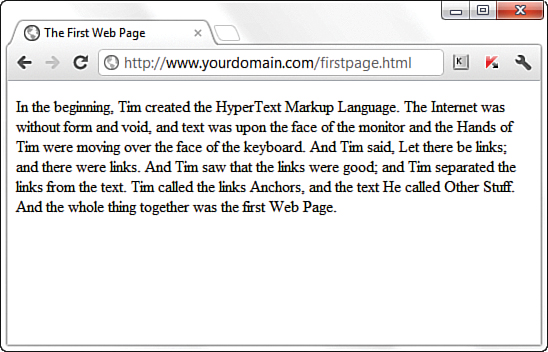
FIGURE 2.1 When you save the text in Listing 2.1 as an HTML file and view it with a web browser, only the actual title and body text are displayed.
In Listing 2.1, as in every HTML page, the words starting with < and ending with > are actually coded commands. These coded commands are called HTML tags because they “tag” pieces of text and tell the web browser what kind of text it is. This allows the web browser to display the text appropriately.
The first line in the document is the document type declaration; you are declaring that it is html (specifically, HTML5) because html is the value used to declare a document as HTML5 in the <!DOCTYPE> tag.
If you have obtained a web hosting account, you could use FTP at this point to transfer the firstpage.html file to the web server. In fact, from this hour forward, the instructions assume that you have a hosting provider and are comfortable sending files back and forth via FTP; if that is not the case, please review the first hour before moving on. Alternatively, if you are consciously choosing to work with files locally (without a web host), be prepared to adjust the instructions to suit your particular needs (such as ignoring the commands “transfer the files” and “type in the URL”).
The time has come for the secret language of HTML tags to be revealed to you. When you understand this language, you will have creative powers far beyond those of other humans. Don’t tell the other humans, but it’s really pretty easy.
The first line of code is the document type declaration; in HTML5, this is simply
<!DOCTYPE html>
Note
You don’t need to be connected to the Internet to view a web page stored on your own computer. By default, your web browser tries to connect to the Internet every time you start it, which makes sense most of the time. However, this can be a hassle if you’re developing pages locally on your hard drive (offline) and you keep getting errors about a page not being found. If you have a full-time web connection via a LAN, cable modem, Wi-Fi, or DSL, this is a moot point because the browser will never complain about being offline. Otherwise, the appropriate action depends on your breed of browser; check the options under your browser’s Tools menu.
This declaration identifies the document as being HTML5, which then ensures web browsers know what to expect and prepare to render content in HTML5.
Many HTML tags have two parts: an opening tag, which indicates where a piece of text begins, and a closing tag, which indicates where the piece of text ends. Closing tags start with a / (forward slash) just after the < symbol.
Another type of tag is the empty tag, which is different, in that it doesn’t include a pair of matching opening and closing tags. Instead, an empty tag consists of a single tag that starts with < and ends with / just before the > symbol. Although the ending slash is no longer explicitly required in HTML5, it does aid in compatibility with XHTML—if you have a pile of old XHTML in your website, it will not break while you’re in the process of upgrading it.
Following is a quick summary of these three tags, just to make sure you understand the role each plays:
< and end with >, as in <html>.</ and end with >, as in </html>.< and end with />, as in <br /> and <img />.For example, the <body> tag in Listing 2.1 tells the web browser where the actual body text of the page begins, and </body> indicates where it ends. Everything between the <body> and </body> tags appears in the main display area of the web browser window, as shown in Figure 2.1.
Note
You no doubt noticed in Listing 2.1 that there is some extra code associated with the <html> tag. This code consists of the language attribute (lang), which is used to specify additional information related to the tag. In this case, it specifies that the language of the text within the HTML is English. If you are writing in a different language, replace the en (for English) with the language identifier relevant to you.
The very top of the browser window (refer to Figure 2.1) shows title text, which is any text that is located between <title> and </title>. The title text also identifies the page on the browser’s Bookmarks or Favorites menu, depending on which browser you use. It’s important to provide titles for your pages so that visitors to the page can properly bookmark them for future reference; search engines also use titles to provide a link to search results.
You will use the <body> and <title> tag pairs in every HTML page you create because every web page needs a title and body text. You will also use the <html> and <head> tag pairs, which are the other two tags shown in Listing 2.1. Putting <html> at the very beginning of a document simply indicates that the document is a web page. The </html> at the end indicates that the web page is over.
Within a page, there is a head section and a body section. Each section is identified by <head> and <body> tags. The idea is that information in the head of the page somehow describes the page but isn’t actually displayed by a web browser. Information placed in the body, however, is displayed by a web browser. The <head> tag always appears near the beginning of the HTML code for a page, just after the opening <html> tag.
Tip
You might find it convenient to create and save a bare-bones page (also known as a skeleton page, or template) with just the DOCTYPE and opening and closing <html>, <head>, <title>, and <body> tags, similar to the document in Listing 2.1. You can then open that document as a starting point whenever you want to make a new web page and save yourself the trouble of typing all those obligatory tags every time.
The <title> tag pair used to identify the title of a page appears within the head of the page, which means it is placed after the opening <head> tag and before the closing </head> tag. In the upcoming hours, you’ll learn about some other advanced header information that can go between <head> and </head>, such as stylesheet rules for formatting the page.
The <p> tag in Listing 2.1 encloses a paragraph of text. You should enclose your chunks of text in the appropriate container elements whenever possible; you’ll learn more about container elements as the book moves forward.
When a web browser displays HTML pages, it pays no attention to line endings or the number of spaces between words. For example, the top version of the poem in Figure 2.2 appears with a single space between all words, even though that’s not how it’s entered in Listing 2.2. This is because extra whitespace in HTML code is automatically reduced to a single space. Additionally, when the text reaches the edge of the browser window, it automatically wraps to the next line, no matter where the line breaks were in the original HTML file.
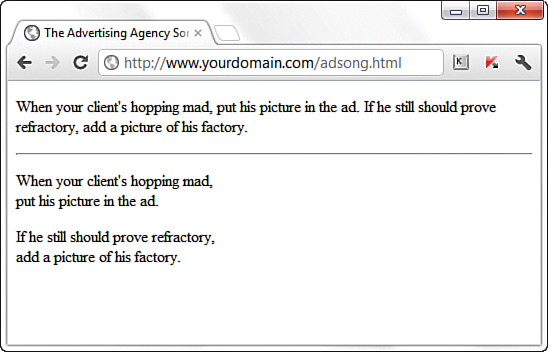
FIGURE 2.2 When the HTML in Listing 2.2 is viewed as a web page, line and paragraph breaks appear only where there are <br /> and <p> tags.
LISTING 2.2 HTML Containing Paragraph and Line Breaks
Note
If a closing slash isn’t required for empty elements, you might ask why it’s used throughout this book. One reason is that over the years, closing tags went from not being required, to required, to not being required (again), and your author is simply stuck in her ways using the perfectly valid but no longer required closing slash. Another reason is that because that middle period was relatively long, a lot of code editors, code generators, and templates use the closing slash, so you will see it used more often than not. It doesn’t matter which way you choose to write because both are valid; just be sure that whatever coding style you follow, you are consistent in its use.
You must use HTML tags if you want to control where line and paragraph breaks actually appear. When text is enclosed within the <p></p> container tags, a line break is assumed after the closing tag. In later hours, you learn to control the height of the line break using CSS. The <br /> tag forces a line break within a paragraph. Unlike the other tags you’ve seen so far, <br /> doesn’t require a closing </br> tag—this is one of those empty tags discussed earlier.
The poem in Listing 2.2 and Figure 2.2 shows the <br /> and <p> tags used to separate the lines and verses of an advertising agency song. You might have also noticed the <hr /> tag in the listing, which causes a horizontal rule line to appear on the page (see Figure 2.2). Inserting a horizontal rule with the <hr /> tag also causes a line break, even if you don’t include a <br /> tag along with it. Like <br />, the <hr /> horizontal rule tag is an empty tag and, therefore, never gets a closing </hr> tag.
Caution
If you are using a word processor to create the web page, be sure to save the HTML file in plain-text or ASCII format.
When you browse web pages on the Internet, you’ll notice that many of them have a heading at the top that appears larger and bolder than the rest of the text. Listing 2.3 is sample code and text for a simple web page containing an example of a heading as compared to normal paragraph text. Any text between <h1> and </h1> tags will appear as a large heading. Additionally, <h2> and <h3> make progressively smaller headings, and so on, as far down as <h6>.
LISTING 2.3 Heading Tags
As you can see in Figure 2.3, the HTML that creates headings couldn’t be simpler. In this example, the phrase “My Widgets” is prominently displayed using the <h1> tag. To create the biggest (level 1) heading, just put an <h1> tag at the beginning and an </h1> tag at the end of the text you want to use as a heading. For a slightly smaller (level 2) heading—for information that is of lesser importance than the title—use the <h2> and </h2> tags around your text. For content that should appear even less prominently than a level 2 heading, use the <h3> and </h3> tags around your text.
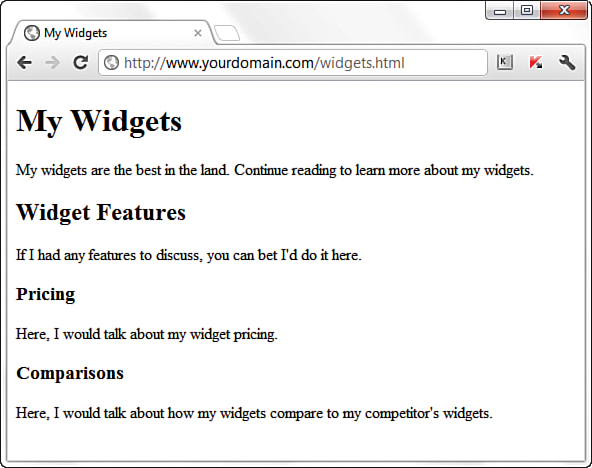
FIGURE 2.3 Using three levels of headings shows the hierarchy of content on this sample product page.
Note
By now, you’ve probably caught on to the fact that HTML code is often indented by its author to reveal the relationship between different parts of the HTML document, as well as for simple ease of reading. This indentation is entirely voluntary—you could just as easily run all the tags together with no spaces or line breaks, and they would still look fine when viewed in a browser. The indentations are for you so that you can quickly look at a page full of code and understand how it fits together. Indenting your code is another good web design habit and ultimately makes your pages easier to maintain, both for yourself and for anyone else who might pick up where you leave off.
However, bear in mind that your headings should follow a content hierarchy; use only one level 1 heading, have one (or more) level 2 headings after the level 1 heading, use level 3 headings directly after level 2 headings, and so on. Do not fall into the trap of assigning headings to content just to make that content display a certain way. Instead, ensure that you are categorizing your content appropriately (as a main heading, a secondary heading, and so on), while using display styles to make that text render a particular way in a web browser.
Theoretically, you can also use <h4>, <h5>, and <h6> tags to make progressively less important headings, but these aren’t used very often. Web browsers seldom show a noticeable difference between these headings and the <h3> headings anyway—although you can control that with your own CSS—and content usually isn’t displayed in such a manner that you’d need six levels of headings to show the content hierarchy.
It’s important to remember the difference between a title and a heading. These two words are often interchangeable in day-to-day English, but when you’re talking HTML, <title> gives the entire page an identifying name that isn’t displayed on the page itself; it’s displayed only on the browser window’s title bar. The heading tags, on the other hand, cause some text on the page to be displayed with visual emphasis. There can be only one <title> per page, and it must appear within the <head> and </head> tags; on the other hand, you can have as many <h1>, <h2>, and <h3> headings as you want, in any order that suits your fancy. However, as I mentioned before, you should use the heading tags to keep tight control over content hierarchy; do not use headings as a way to achieve a particular look, because that’s what CSS is for.
HTML5 includes tags that enable you to enhance the semantics—the meaning—of the information that you provide in your marked-up text. Instead of simply using HTML as a presentation language, as was the practice in the very early days when <b> for bold and <i> for italics was the norm, modern HTML has as one of its goals the separation of presentation and meaning. While using CSS to provide guidelines for presentation, composers of HTML can provide meaningful names within their markup for individual elements not only through the use of IDs and class names (which you learn about later in this book), but also through the use of semantic elements.
Caution
Don’t forget that anything placed in the head of a web page is not intended to be viewed on the page, whereas everything in the body of the page is intended for viewing.
Some of the semantic elements available in HTML5 follow:
<header></header>—This may seem counterintuitive, but you can use multiple <header> tags within a single page. The <header> tag should be used as a container for introductory information, so it might be only once in your page (likely at the top)—but you also might use it several times if your page content is broken into sections. Any container element can have a <header> element; just make sure that you’re using it to include introductory information about the element it is contained within.<footer></footer>—The <footer> tag is used to contain additional information about its containing element (page or section), such as copyright and author information or links to related resources.<nav></nav>—If your site has navigational elements, such as links to other sections within a site or even within the page itself, these links go in a <nav> tag. A <nav> tag typically is found in the first instance of a <header> tag, just because people tend to put navigation at the top and consider it introductory information, but that is not a requirement. You can put your <nav> element anywhere (as long as it includes navigation), and you can have as many on a page as you need (often no more than two, but you may feel otherwise).<section></section>—The <section> tag contains anything that relates thematically; it can also contain a <header> tag for introductory information and possible a <footer> tag for other related information. You can think of a <section> as carrying more meaning than a standard <p> (paragraph) or <div> (division) tag, which typically conveys no meaning at all; the use of <section> conveys a relationship between the content elements it contains.<article></article>—An <article> tag is like a <section> tag, in that it can contain a <header>, a <footer>, and other container elements such as paragraphs and divisions. But the additional meaning carried with the <article> tag is that it is, well, like an article in a newspaper or other publication. Use this tag around blog posts, news articles, reviews, and other items that fit this description. One key difference between an <article> and a <section> is that an <article> is a standalone body of work, whereas a <section> is a thematic grouping of information.<aside></aside>—Use the <aside> tag to indicate secondary information; if the <aside> tag is within a <section> or <article>, the relationship will be to those containers; otherwise, the secondary relationship will be to the overall page or site itself. It might make sense to think of the <aside> as a sidebar—either for all the content on the page or for an article or other thematic container of information.These semantic elements will become clearer as you practice using them. In general, using semantic elements is a good idea because they provide additional meaning not only for yourself and other designers and programmers reading and working with your markup, but also for machines. Web browsers and screen readers will respond to your semantic elements by using these elements to determine the structure of your document; screen readers will report a deeper meaning to users, thus increasing the accessibility of your material.
Throughout this book, you make use of these and other semantic elements for page structure, in addition to the standard types of block elements that HTML provides.
In the first hour, I discussed ways to test your pages; one very important way to test your pages is to validate them. Think of it this way: It’s one thing to design and draw a beautiful set of house plans, but it’s quite another for an architect to stamp it as a safe structure suitable for construction. Validating your web pages is a similar process; in this case, however, the architect is an application, not a person.
In brief, validation is the process of testing your pages with a special application that searches for errors and makes sure your pages follow the strict XHTML standard. Validation is simple. In fact, the standards body responsible for developing web standards, the World Wide Web Consortium (W3C), offers an online validation tool you can use. To validate a page, follow this URL: http://validator.w3.org/. Figure 2.4 shows the W3C Markup Validation Service.
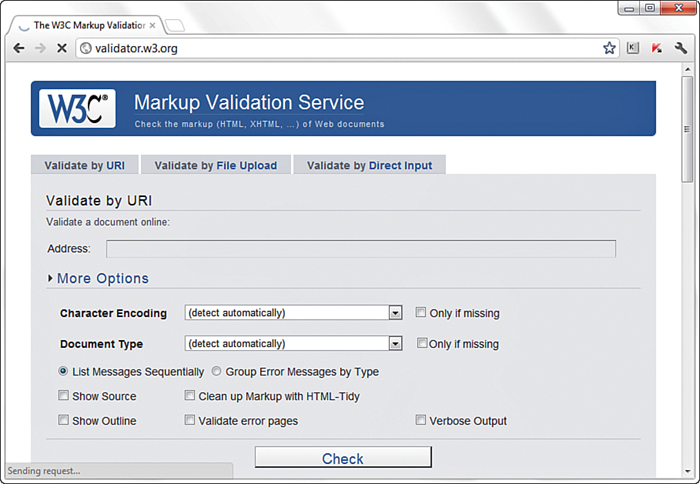
FIGURE 2.4 The W3C Markup Validation Service enables you to validate an HTML (XHTML) document to ensure that it has been coded accurately.
If you’ve already published a page online, you can use the Validate by URI tab. Use the Validate by File Upload tab to validate files stored on your local computer file system. The Validate by Direct Input tab enables you to paste the contents of a file from your text editor. If all goes well, your page will get a passing report (see Figure 2.5).

FIGURE 2.5 If a page passes the W3C Markup Validation Service, you know it is ready for prime time.
If the W3C Markup Validation Service encounters an error in your web page, it provides specific details (including the line numbers of the offending code). This is a great way to hunt down problems and rid your pages of buggy code. Validation not only informs you when your pages are constructed properly, but it also assists you in finding and fixing problems before you post pages for the world to see.
Tip
Some web development tools include built-in validation features you can use in lieu of the W3C Markup Validation Service. Some examples include browser extensions such as Firebug (http://getfirebug.com/) and HTML Validator (http://users.skynet.be/mgueury/mozilla/), but many other programs offer similar functionality—check your user documentation.
This hour introduced the basics of what web pages are and how they work. You learned that coded HTML commands are included in a text file, and you saw that typing HTML text yourself is better than using a graphical editor to create HTML commands for you—especially when you’re learning HTML.
You were introduced to the most basic and important HTML tags. By adding these coded commands to any plain-text document, you can quickly transform it into a bona fide web page. You learned that the first step in creating a web page is to put a few obligatory HTML tags at the beginning and end, including adding a title for the page. You can then mark where paragraphs and lines end and add horizontal rules and headings, if you want them. You also got a taste of some of the semantic tags in HTML5, which are used to provide additional meaning by delineating the types of content your pages contain (not just the content itself). Table 2.1 summarizes all the tags introduced in this hour.
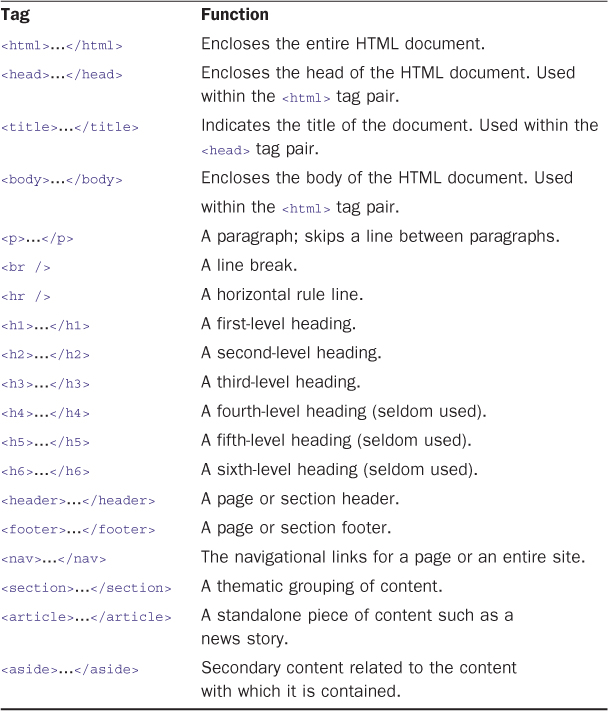
TABLE 2.1 HTML Tags Covered in Hour 2
Finally, you learned about the importance of validating your HTML and how to do this using online validation tools.
Q. I’ve created a web page, but when I open the file in my web browser, I see all the text, including the HTML tags. Sometimes I even see weird gobbledygook characters at the top of the page. What did I do wrong?
A. You didn’t save the file as plain text. Try saving the file again, being careful to save it as Text Only or ASCII Text. If you can’t quite figure out how to get your word processor to do that, don’t stress. Just type your HTML files in Notepad or TextEdit instead, and everything should work just fine. (Also, always make sure that the filename of your web page ends in .html or .htm.)
Q. I’ve seen web pages on the Internet that don’t have <!DOCTYPE> or <html> tags at the beginning. You said pages always have to start with these tags. What’s the deal?
A. Many web browsers will forgive you if you forget to include the <!DOCTYPE> or <html> tag and will display the page correctly anyway. However, it’s a very good idea to include it because some software does need it to identify the page as valid HTML. Besides, you want your pages to be bona fide HTML pages so that they conform to the latest web standards.