| |
Appendix H:
Using Head Elements
The head of an HTML document contains information that is used behind the scenes, by the Web browser, a Web server, a CGI script, and robots that index the Web for search engines and so on.
About the Document Head
Kinds of Head Tags
Viewing Head Content
Inserting Keywords
Inserting a Page Description
Inserting a Refresh Tag
Inserting Other Meta Tags
Inserting a Base Href or Base Target
Inserting a Link Descriptor
Editing Head Elements
About the Document Head
When you create a new Web page in Dreamweaver, the head of the document looks like this:
<head>

  <title>Untitled Document</title>

  <meta http-equiv="Content-Type" content="text/html; charset=iso-8859-1">

  <head>
The <title> tag is included within the <head> tag and is displayed in the title bar of both Dreamweaver and the Web browser. The second tag is a meta tag. This particular meta tag indicates the content type of the document, which for Web pages is "text/html". The charset attribute indicates that the language encoding of the page is Western (or the character set for another language of your choice).
The document head can include other meta tags and document information.
Within the <head> tag, the document may also include scripts, style sheets, links to scripts and style sheets, and so on.
Kinds of Head Tags
Meta Tags
The word meta means "about," and meta tags include data about the page they appear on. The standard HTML meta tags include the following: keywords, description, and refresh. Meta tags do not take a closing tag, and they look like this:
<meta name="keywords" content="baseball, mom, apple pie">
Let's look at each in turn.
Keywords describe the content of the page and are used by some search engines when filing the page into categories or when building an index of search terms.
The page Description is also often used by search engines, some of which display the page description when they return search results to a user on the Web. Some internal databases use the description data for similar purposes.
Refresh can be used to reload a page or to send the user to a different URL. This requires no JavaScript.
You can also create your own, custom meta tags for use with a database, a server, for personal use, or for use with another indexing system or meta-content system such as XML or RSS. For example, some filtering software relies on the meta tags that "child-safe" or "pornographic" pages insert on their pages.
Other Head Content Tags
The Link tag is not the same as clickable links that appear on the page. This URL is used to define a relationship between the current page and another page, whether that be a style sheet, a script, a help file, or what have you.
The Base is the URL that is the location of the main page in the site. When documents are linked relatively, the Base URL is the one they are considered to be relative to. This is not a meta tag, although it has a similarly descriptive purpose.
Viewing Head Content
Dreamweaver includes a toolbar in the Document window you can use to manage your head content.
To view head content:
- From the Document window menu bar, select View > Head Content. The Head Content toolbar will appear (Figure 1).
You'll see two icons on every page, one each for the page title and the content type. These icons appear even on new, blank pages, because they're part of the basic page structure that Dreamweaver adds to new pages before you edit them.
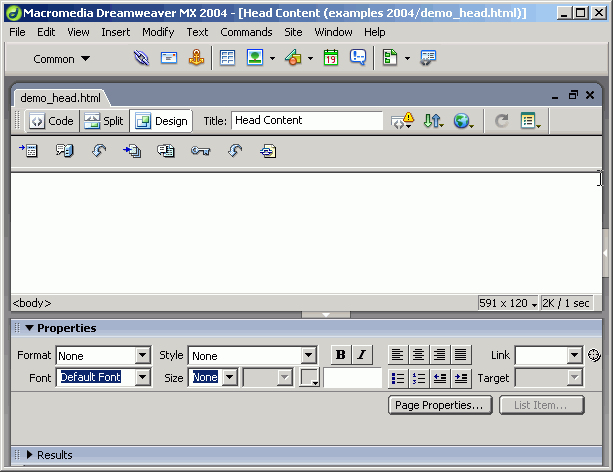
Figure 1 The Head Content toolbar displays an icon for each head element on your page.
- To view the code in the Code inspector or code view, click on the icon in the Head Content toolbar. The code will be selected (Figure 2).
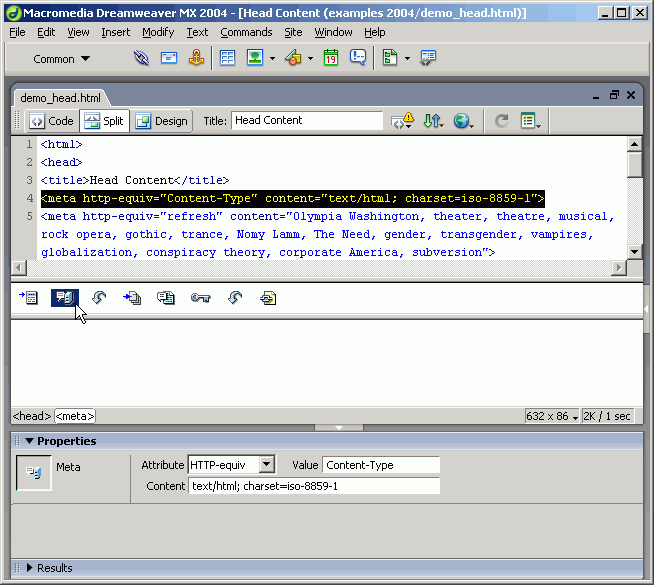
Figure 2 Click on a head content icon, and the code will be selected in Code view.
- To view the properties of an icon in the Property inspector, click on the icon. (Double-click it to make the Property inspector appear.) We'll look at the Property inspector for each kind of head content as we continue.
Inserting Keywords
Keywords are words that relate to the content on the page, even if the page itself doesn't use those words. Keywords are used by some search engines to index pages. Search engines that use keywords ignore duplicates and many have a limit to how many they will index. So no, it won't do you any good to type "SEX SEX SEX" on your page about baseball heroes. If you're curious about what criteria a particular search engine uses, visit the help files for that site.
To insert keywords:
- From the Document window menu bar, select Insert > HTML > Head Tags > Keywords. The Keywords dialog box will appear (Figure 3).

Figure 3 Type your keywords in the Keywords dialog box.
- In the Keywords text box, type a short list of words related to your page. Separate them by commas.
These should be relevant words that people might search on. Many indexes use only the first 50 (or fewer) keywords. On the other hand, you may want to include common synonyms or even common misspellings of words that people will search for.
- When you're finished, click on OK. Dreamweaver will add the Keywords icon to the Head Elements toolbar, and the code will look like this:
<meta name="keywords" content="Olympia Washington, theater, theatre, musical, rock opera, gothic, trance, Nomy Lamm, The Need, gender, transgender, vampires, globalization, conspiracy theory, corporate America, subversion">
To edit keywords:
- Click on the Keywords icon
 in the Head Content toolbar. The Property inspector will display Keyword properties (Figure 4). in the Head Content toolbar. The Property inspector will display Keyword properties (Figure 4). 
Figure 4 Edit your keywords in the Property inspector.
- Make any changes to your keywords, and click elsewhere on the Property inspector to apply your changes.
Inserting a Page Description
A page description describes the purpose or content of a page.
To insert a page description:
- From the Document window menu bar, select Insert > HTML > Head Tags > Description. The Description dialog box will appear (Figure 5).
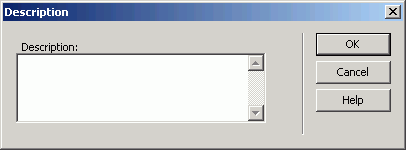
Figure 5 Type your page description in the Description dialog box.
- In the Description text box, type a short description of your page, using lots of relevant words that people might search on. Many indexes display only the first 50 words of a description.
For example, if you're selling something, list the items for sale. If it's an article, include the first paragraph or write an abstract of the article. If it's a small business, describe where you are and what you do.
- When you're finished, click on OK. Dreamweaver will add the Description icon to the Head Elements toolbar, and the code will look like this:
<meta name="description" content="Hanker for a hunk of cheese? Our hand-crafted goat cheddars and soy cottage cheese will really whet your appetite. Visit our store in Montpelier, Vermont, or order yourself or your family a gift from our virtual cheese counter.">
To edit your page description:
- Click on the Description icon
 in the Head Content toolbar. The Property inspector will display Description properties (Figure 6). in the Head Content toolbar. The Property inspector will display Description properties (Figure 6).
- Make any changes to your keywords, and click elsewhere on the Property inspector to apply your changes.
Note
- In some instances, I found that selecting the page description and clicking within the text box in the Property inspector revealed the keywords rather than the page description. If this happens, you can select the Description icon and then edit the description in the Code inspector or Code view.

Figure 6 Edit your page description in the Property inspector.
Inserting a Refresh Tag
A refresh tag can reload your page or send the viewer to another page. You often see refresh tags used when a page has moved, to send the visitor to the new, correct URL. You can also use refresh tags with JavaScript or CGI scripts to reload the page and make it use a new color, say, or play a new song.
To insert a refresh tag:
- From the Document window menu bar, select Insert > HTML > Head Tags > Refresh. The Refresh dialog box will appear (Figure 7).
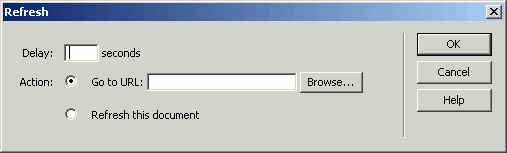
Figure 7 Create your refresh tag in the Refresh dialog box.
- In the Delay text box, type the number of seconds after the page has finished loading before the refresh action will occur. Five seconds is often enough to let the user see the current page before the new one loads.
- If the action is to reload the current page, click on the Refresh This Document radio button.
or
If the action is to have the Web browser open a new page, click on the Go to URL radio button. Then, type (or paste) the URL for the new page, or use the Browse button to open the Select File dialog box and locate a page in your local site.
- When you're finished, click on OK. Dreamweaver will add the Description icon to the Head Elements toolbar, and the code will look like this:
<meta http-equiv="refresh" content="5;URL=http://www.digitalsf.org/">
To edit your refresh tag:
- Click on the Base icon
 in the Head Content toolbar. The Property inspector will display Refresh properties (Figure 8). in the Head Content toolbar. The Property inspector will display Refresh properties (Figure 8).

Figure 8 Edit your refresh tag content in the Property inspector.
- Make any changes to the number of seconds or the URL, and click elsewhere on the Property inspector to apply your changes.
Note
- In some instances, I found that selecting the refresh tag and clicking within the text box in the Property inspector cleared all data from the tag or inserted the keywords data instead of the refresh data. Yikes! In this instance, you should edit the tag within the Code inspector or Code view instead of the Property inspector.
Inserting Other Meta Tags
There are any number of Meta tags you may need to put on your page. Of course, you can always type them in the Code inspector, or you can use Dreamweaver's tools to help.
To insert a special meta tag:
- From the Document window menu bar, select Insert > HTML > Head Tags > Meta. The Insert Meta dialog box will appear (Figure 9).
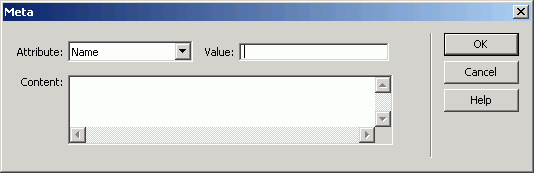
Figure 9 Create your meta tag in the Meta dialog box.
- From the Attribute drop-down menu, select either Name (meta information about the page) or HTTP-equiv (for page transferring attributes; this is what refresh uses).
- In the Value text box, type the kind of Meta tag this is. Examples include Author, Language, CreationDate, and so on. There is no list of valid values; these are used differently on different pages.
- In the Content text box, type (or paste) data content of the attribute. For example, you could include PICS rating data, information about the page author, or information for a specific database or search engine.
- When you're finished, click on OK. Dreamweaver will add the Keywords icon to the Head Elements toolbar, and the code will look like something below:
<meta name="author" content="Joe Brainard">

                                      <meta name="CreationDate" content="June 2, 2006">

                                      <meta name="language" content="American English">
Keep in mind that Meta name tags for description, keywords, and refresh each have their own dialog box in Dreamweaver.
To edit a special meta tag:
- Click on the Meta icon in the Head Content toolbar; the first
 is for HTTP-equiv and the second is for HTTP-equiv and the second  is for Name. The Property inspector will display Meta properties (Figure 10). is for Name. The Property inspector will display Meta properties (Figure 10).

Figure 10 Edit your meta tag in the Property inspector.
- Make any changes to your keywords, and click elsewhere on the Property inspector to apply your changes.
Inserting a Base Href
A Base Href tag indicates the location of the central page in the site that relative links are based on. Generally this is the index.html page (or other default page) that is the central content page for the entire sit. When you want to set a different base target for a special group of pages, you use this base reference tag to do so. When you insert this tag on different pages throughout a site, each one will indicate its document-relative location to the base page.
You can also set this for pages in a frameset to indicate which frame is the usual, or base, target, so that you target only those links that differ from the base.
To insert a base href:
- From the Document window menu bar, select Insert > HTML > Head Tags > Base. The Base dialog box will appear (Figure 11).
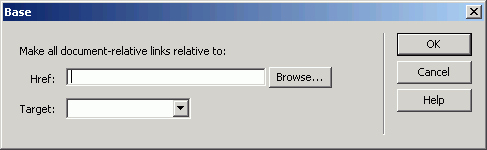
Figure 11 Create your base href tag in the Insert Base dialog box.
- In the Href text box, type the location of the base target page; or, click on Browse to open the Select File dialog box and choose a file from your local site. In the latter case, Dreamweaver will code the correct document-relative link path for you.
- The target attribute sets a base location in which all the links on the page should open. This can be a frame, a new window, or a JavaScript window. Using targets is fully described in Chapter 13. To make all links open in a new window, select _blank. To make all links open in the current window, select _top.
- When you're finished, click on OK. Dreamweaver will add the Refresh icon to the Head Elements toolbar, and the code will look like this:
<base href="../appendix/index.html" target="_blank">
To edit your Base Href tag:
- Click on the Base icon in the Head Content toolbar The Property inspector will display Base properties (Figure 12).

Figure 12 Edit your base href tag in the Property inspector. I'm doing two things here: First, I'm setting a base that's different from my index page; I don't need to set a base for my index page, unless it's an index page in a different part of my site. Second, I'm setting a base target of "_blank" -- that means that every link on my page will open its target in a new browser window.
- Make any changes to the base page location or the target, and click elsewhere on the Property inspector to apply your changes.
Inserting a Link Descriptor
A <link> tag does not appear in the body of the page and is therefore not clickable, although browser software or scripts may use the contents of a link tag to interpret the data. Link tags are used to indicate the relationship between the current page and other pages in a series or a set.
Several attributes can be applied to a link, although currently many of them have not been implemented in a browser. The HTML 4.0 spec has lots of ideas about using the link tag to be able to index, print, or otherwise collate documents.
For instance:
<TITLE>Part III: In Which Gertrude Loses Her Favorite Neckerchief and Discovers Herself </TITLE>

<LINK rel="prev" href="partii.html">

<LINK rel="next" href="partiv.html">
The rel attribute describes a relationship between the current page and another document. The href attribute describes the location of that other page. You may have seen these attributes used when linking to a style sheet:
<link rel="stylesheet" href="../hh.css" type="text/css">
Examples of rel relationships that appear in the W3C spec include stylesheet, glossary, appendix, subsection, section, chapter, content, index; and the aforementioned start, prev, and next; as well as alternate, help, and bookmark. You can see the potential here, even if it hasn't been exploited: you could offer a menu of alternate pages, an index, a help site, and so on. You can even create a browser profile that uses new data types, although this too is still nascent. If you want to define more than one rel, you separate the contents by spaces: rel="stylesheet help"
The counterpart of rel is rev, which describes a reverse relationship. If your rel is bookmark, your bookmark file would include a rev pointing to its pages. This is still mostly hypothetical rather than practiced.
The id attribute is a unique identifier for your link. You don't need to include this unless your document will be parsed for it, by say an XML tool.
The title attribute is another new attribute that can be used all kind of crazy ways; when dealing with the link tag, it's reserved for style sheet selectors that have not yet been implemented. These would allow the user or the user's software to choose a style sheet based on the equipment being used.
For more information on the <link> tag, visit the W3C spec.
To insert a link:
- From the Document window menu bar, select Insert > HTML > Head Tags > Link. The Link dialog box will appear (Figure 13).
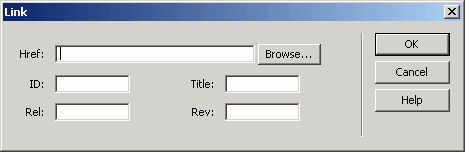
Figure 13 Create your link tag in the Link dialog box.
- In the Href text box, type (or paste) the URL for the related page, or use the Browse button to open the Select File dialog box and locate a page in your local site.
- In the Rel text box, type the relationship to the linked page.
- If you have uses for ID, title, or rev, please fill in those blanks.
- When you're finished, click on OK. Dreamweaver will add the Link icon to the Head Elements toolbar, and the code will look like this:
<link rel="index" href="../index.rdf" type="text/rdf">
To edit your Link tag:
- Click on the Link icon in the Head Content toolbar The Property inspector will display Link properties (Figure 14).

Figure 14 Edit your link tag in the Property inspector.
- Make any changes to your link properties, and click elsewhere on the Property inspector to apply your changes.
Editing Head Elements
After you insert a head element, you can edit its content in the Property inspector. Click on a head icon in the Document window toolbar, or double-click it to make the Property inspector appear. Editing each type of tag is discussed in the relevant section.
|