You can use frames to create some nifty layouts. Because each page is a discrete HTML document, it can contain any HTML element except the <FRAMESET> tag--although we'll find out how to embed frames within frames in the section called Nested Framesets.
Frames are best used when you want part of your page, such as a toolbar or a table of contents, to be visible the entire time the page is in the window--regardless of what kind of scrolling your visitors do.
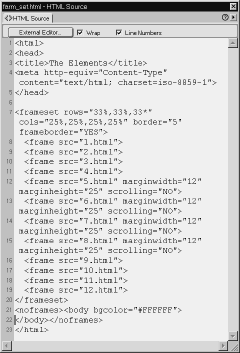
Each document in a frameset is an individual HTML document. In the background, the frameset page acts as mission control, holding together all the documents. Each frame has a default document anchored to it so that something will load when the frames page is loaded. You can see the code for a frameset page in Figure 11.2. Figure 11.3 presents a diagram of the frame structure.
Tip

Figure 11.2 A frames-based page is held together behind
the scenes by a frameset page, which keeps track of what belongs where. This
is the frameset page code for the page in Figure 11.1.
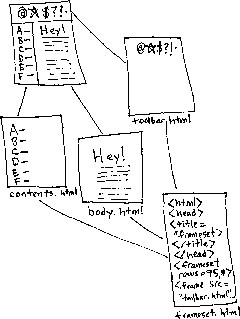
Figure 11.3 An infinite number of pages can be associated with a frames page via links.
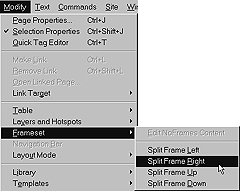
Figure 11.4 Choose Modify > Frameset from the Document
window menu bar.
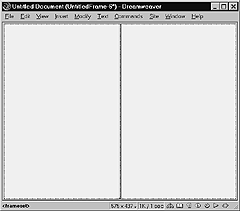
Figure 11.5 The Split Frame Left and Split Frame Right
commands both split the current frame in half with a vertical frame border.
Dreamweaver will automatically create a frameset when you divide a page into more than one frame.
To create frames by splitting the page:
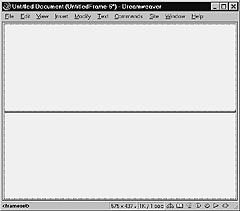
Figure 11.6 The Split Frame Up and Split Frame Down commands both split the current frame in half with a horizontal frame border.
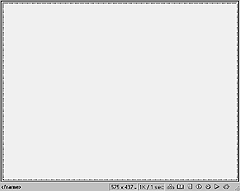
Figure 11.7 The heavy outline that appears should resemble
the frame borders you've seen on pages around the Web.
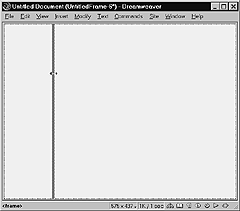
Figure 11.8 Hold down the Alt (Option) key and click
on the border, and you can create a new frame by splitting the original page.
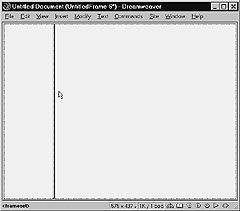
Figure 11.9 Let go of the mouse button when the frame border is where you want. Ta-da! You now have two frames.
You can also create a frame border and drag it to create multiple frames on a page.
To create a frame by dragging:
You now have two frames in the window.
Tip
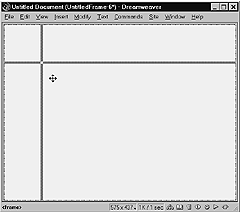
Figure 11.10 If you hold down the Alt (Option) key and click the corner of a frame border, you can drag it to split the page into four frames.
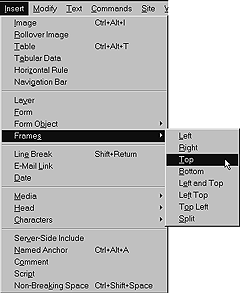
Figure 11.11 Select Insert > Frames from the Document window menu
bar, and then choose a layout option.
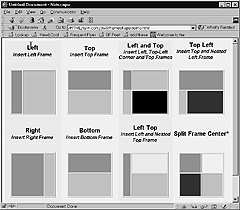
Figure 11.12 The heading over each layout is its name in the Insert
> Frames menu, and the subhead is the name of the layout in the Frames panel
of the Objects palette. Split Frame Center, is available only in the Objects
palette.
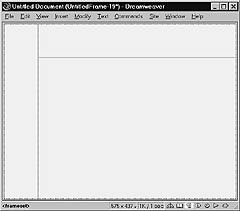
Figure 11.13 I selected Left Top from the Insert > Frames menu, and the layout appeared in the Document window. Note that the frame borders are not heavy; they've been turned off in the preset attributes of the layout.

Figure 11.14 You can select the Objects palette by pressing Ctrl+F2 (Cmd+F2), or by selecting Window > Objects from the Document window menu bar.
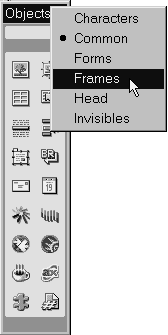
Figure 11.15 Click on the menu button on top of the Objects palette to display various flavors of objects, including Frames.

Figure 11.16 Frames objects are actually layouts that you can apply to your page with the click of a button. I resized the palette (by dragging the lower-right corner) after selecting Frames objects.
Two new features in Dreamweaver 3 are the command Insert > Frames and the Frames panel on the Objects palette, both of which allow you to choose a basic, preset frames page layout. Select a layout from the menu, and it will appear in the Document window.
If you create a frames page using one of these methods, you can skip the next couple of sections about how to add frames to a page, but even if you love the designs as they are, be sure to read the section called Targeting Links, later in this chapter.
To use the Insert Frames menu:
(The last item, Split Frame Center•, splits existing frames.)
The Document window will create the frameset design you selected (Figure 11.13).
Tip
To create frames using the Objects palette:
Tips
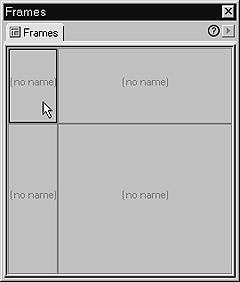
Figure 11.17 In this figure, the Frames inspector stands
alone. In Figure 11.18, I've dragged it onto a set of stacked palettes,
as described in Chapter 1.
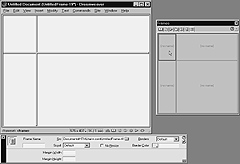
Figure 11.18 When you select a frame, a heavy line appears around
the frame in the Frames inspector, and a dashed line appears around it in the
Document window. Additionally, the Properties inspector displays Frame properties
for the frame you selected.
The Frames inspector is a useful tool for selecting individual frames or entire framesets. To view the Frames inspector, select Window > Frame from the Document window menu bar or press Ctrl+F10 (Command+F10). The Frames inspector will appear (Figure 11.17).
You will need to select individual frames when modifying properties.
To select a frame:
Selecting a frameset
You can select an entire frameset in one of two ways:
Click on any of the frame borders in the Document window.-or-In the Frames inspector, click on the border around the outside edge of the frames.
Either way, the Properties inspector will display properties for the frameset, and a dashed line will appear around all the frames in the frameset (Figure 11.19).
Note that the Properties inspector displays all the columns and rows in a frameset, but that all frames are shown as if they had the same dimensions.
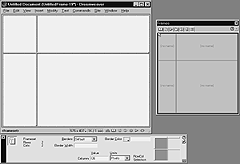
Figure 11.19 When you select an entire frameset by clicking on the frame border in the Document window or Properties inspector, the Properties inspector displays properties for the frameset.
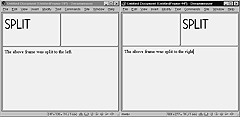
Figure 11.20 These two frames pages are pretty much the same. In the one on the left, the top frame was split left, while in the right-hand window, the same frame was split right. Which option you choose depends on where you want any content in the frame to land.
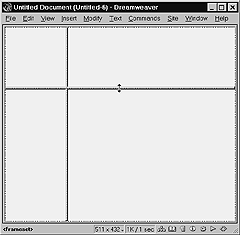
Figure 11.21 When you mouse over a border between frames,
the pointer becomes a double-headed arrow that you can use to drag the border.
You have limitless options when it comes to laying out pages with frames. You can divide frames the same way you created them initially: by splitting or by dragging. You'll probably do some experimenting before you achieve the layout you want.
To split frames:
Splitting left or right, up or down may look exactly the same unless there is already content in the frame. For example, the left window in Figure 11.20 shows a frame that was split left, and the right window shows the same frame split right instead.
To drag and reposition frame borders:
Tip
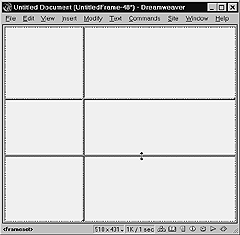
Figure 11.22 If you hold down the Alt (Option) key while clicking on the frame border, you can split a frame by dragging the border.
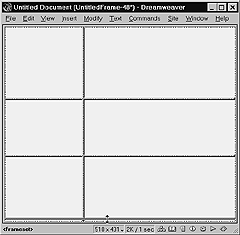
Figure 11.23 Click on the border of the unwanted frame, and drag it off the page. You'll get rid of both the frame and the border.
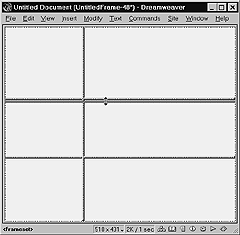
Figure 11.24 You can also drag a frame border into another
frame border to get rid of it.
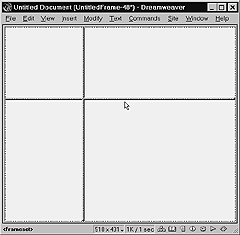
Figure 11.25 Either way, you'll be free of the unwanted frame.
You can keep splitting frames until you achieve the layout you want, but if you create a few frames too many, getting rid of them is easy.
To delete a frame:
Dragging Content Between Frames
Before you delete that frame, you can drag its content into another frame on the page. This works for all sorts of objects, including text, images, multimedia objects, and form fields. Click on the object to select it, or highlight the text you wish to move. Click and hold down the mouse button while you drag the object to a new frame. When the stuff is where you want it, let go of the mouse button, and it will reappear in the new location.
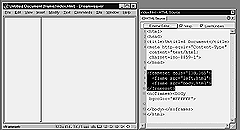
Figure 11.26 In the HTML inspector, you can see the highlighted code for the frameset, which includes the locations of the documents within it. Two frames, one frameset.
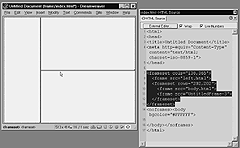
Figure 11.27 Now, in the HTML inspector, you can see a frameset
tag nested within the frameset tag.
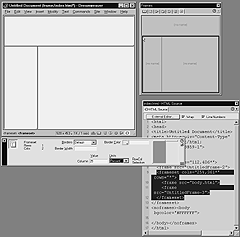
Figure 11.28 Dreamweaver automatically nests a new frameset inside the original, and you can select the child frameset with the Frames inspector. In the HTML inspector, you can see that only the nested frameset code is selected. And in the tag selector, you can see two <Frameset> tags, the second of which is selected.
Once your initial frame page layout is created, you can divide the space within any individual frame by inserting another frameset that is nested within the original frameset. Dreamweaver creates nested framesets automatically when you split a frame. The original frameset is called the parent, and the frameset within the parent set is called the child. You can theoretically keep nesting framesets until the cows come home, and the hierarchy will always have the child frameset reporting to its immediate parent.
An original frameset is shown in Figure 11.26. In framesets with no nested framesets inside them, all frame borders go from one edge of the window to the other. In Figure 11.27, The first frameset includes one frame of its own (the left-hand frame), plus the nested frameset. The second, nested frameset includes the two frames in the right-hand column.
Creating a nested frameset involves the same tasks as any other frameset. You can watch how Dreamweaver modifies the code by keeping the HTML inspector open while you follow these steps.
To create a nested frameset:
Dreamweaver has created a second frameset nested within the original frameset. You can examine the structure of the document by using the Frames inspector.
Tips
To view the structure of a document:
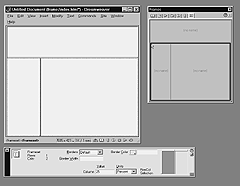
Figure 11.29 The frameset is made up of two rows (across the window), and a nested frameset that has two columns (vertical divisions of the lower frame). In this figure, the Properties inspector is displaying Frameset properties for the child (nested) frameset.
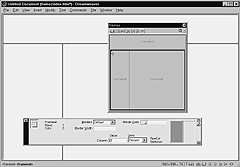
Figure 11.30 Here, you see the same frameset, in a resized (larger)
window. Notice how the top frame retains the same, exact size (112 pixels) while
the bottom frames retain their proportional settings. The left frame still occupies
25 percent of the window.
![]()
Figure 11.31 The Properties inspector displays frameset options when you click on a frame border in the Document window
![]()
Figure 11.32 Click on a tab in the frameset preview of the Properties inspector to adjust settings for that column or row.
Frames, just like tables, are divided into columns and rows. You could think of the individual frames in a set as cells, each of which occupies a certain number of columns and rows. (See Chapter 10 for more on cells, columns, and rows).
When you split a frame or drag a frame border, Dreamweaver translates the information about the position of the frame border into a height or width amount for each frame, in pixels or percent of the window. To adjust the height or width of a frame, you can adjust the row height or column width.
The page in Figure 11.29 is comprised of two framesets (look at the Frames inspector to see this more clearly). The first frameset is made up of two rows. The top frame, or row, is 112 pixels high. The bottom row is set relative to that height; it will take up the rest of the browser window, however small or large (Figure 11.30).
The embedded frameset is made up of two columns. The left column occupies 25 percent of the available space--in this case, it's both 25 percent of the parent frame and 25 percent of the window. The right column, then, can be set to either 75 percent or to relative to the parent frameset's width.
Tips
To adjust row height and column width:
Tip

Figure 11.33 Select either Pixels, Percent, or Relative as the units for the height or width measurement.
![]()
Figure 11.34 When the Properties inspector displays frame properties, you can set the location for the default frame document in the SRC text box.
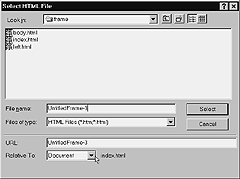
Figure 11.35 Use the Select HTML File dialog box to choose
a file to load in the frame.
There are two ways you can go about putting content into those pretty, blank frames. One way is to open an existing page in the framework of the frameset; the other way is to create your new page right now in the Dreamweaver Document window. In either case, to determine what your frames page will display when it's loaded into a Web browser, you'll attach a URL to each of the frames in the set.
To attach a page to a frame:
If you use one of the two latter options, locate the file on your computer, and then click on Open (Choose) to attach the file to the frame you selected. (See Chapter 2 if you need more information on using the Select HTML File dialog box.)
If the file you selected is on your local machine, it will appear in the frame within the Document window.
If you type a full Internet URL in the Frame Properties SRC text box, the Document window will display the "Remote File" message (Figure 11.36).
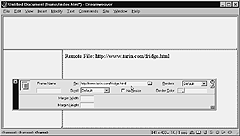
Figure 11.36 Figure 11.36 If you're connected to the Internet when you preview this page in your browser, the browser should load the remote file in the frame.
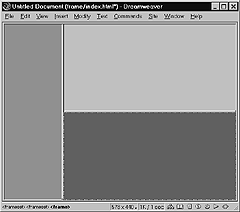
Figure 11.37 This page has three frames, each of which uses a different background color. Back in Figure 11.1, eight of the 12 frames used different background images.
Creating and editing content within one of the frames in a frameset is the same as doing so in a blank Dreamweaver window, only with less screen real estate.
On frames pages you can put text, images, multimedia objects, and tables--anything that you can use on a non-frames page.
Tip
Setting the background color for a frame is just like setting the background color for a stand-alone page. Each frame, remember, is a single HTML document, or page, and each page in the frameset has its own page properties. Figure 11.37 shows a frames page in which every frame has a different background.
To set a frame background:
Relativity Theory
In my experience, in most browsers, frames documents should be linked to one another using document relative links rather than site root relative links. The frameset document contains the links, and the initial frames pages within the frameset should be given paths relative to that page.
As you can see in Figure 11.35 on the previous page, when you select a file to use in a frame, you have the option, in the drop-down menu at the bottom of the Select HTML File dialog box, to choose that the files be Relative To the Document or to the Site Root. Choose Document, and Dreamweaver will automatically choose the Frameset page as the relative one.
After you save a page as described in the next section, you can check to see if it has a Document Relative relationship by following steps 1 and 2 in Setting Content Pages, earlier in this chapter, and then confirming that the Relative To drop-down menu indicates Document.
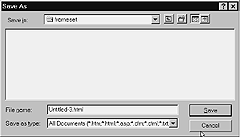
Figure 11.38 This Save As dialog box is no different from any other one in Dreamweaver. Some other Web page programs, such as Microsoft FrontPage, have distinct Save As dialog boxes for the different parts of a frameset.
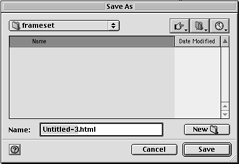
Figure 11.39 The Save As dialog box on the Mac.
Because frames pages are made up of multiple documents, saving them is a multistep process. If you just press Ctrl+S (Command+S), you might not be quite sure of which page you're saving, because Dreamweaver's Save dialog box doesn't offer any distinguishing marks. You need to save each frame separately because they are distinct documents.
You can skip these steps for any previously completed pages you attached to the frameset, as described in Setting Content Pages, earlier in this chapter.
To save each frame:
Tip
Saving All Your Work at Once
After you've saved all the pages in your frameset once, you can periodically save all of them at the same time.
From the Document window menu bar, select File > Save All. Changes to documents currently open in any Dreamweaver window will be saved. A Save As dialog box will appear for any previously unsaved documents open in Dreamweaver.
The frameset page, which contains all the behind-the-scenes data that makes the page function as a frames page, needs to be saved separately as well.
To save the frameset page:
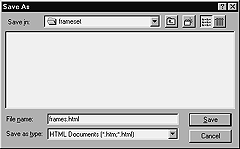
Figure 11.40 The URL for this page will end up being something like http://www.yoursite.com/frameset/ frames.html. If you want your frameset to appear as the default page in a directory, name the frameset document index.html, or whatever your house convention is for a default page.
Tips
Titling the Frameset Page
Because the frameset page is the one whose URL you'll point to, and because it's the page-in-charge, you need to give it a title:
There are several options you can set for the frames in your page, including options for scrollbars and borders, whether the frames can be resized, and margin settings for each frame.
You can set scrollbar options for each frame on a page. Figure 11.41 demonstrates these options.
To set scrollbar options:
Note that these scrollbar settings affect both horizontal and vertical scrollbars. The Yes and No settings should be used with discretion.
Generally, when a frames page is loaded into a browser window, the user can resize the frames to personal taste or viewing convenience. If you want some or all of the frames in your page not to be resized, you can set the No Resize option.
To use the No Resize option:
Obviously, all frames adjacent to frames with the No Resize option selected will not be able to be resized on that border. In Figure 11.41, it sure would be nice to be able to resize some of those frames.
You can turn off borders for the frames on a page, and you can set the width of all the borders on a page. These are frameset options rather than a single-frame option.
Figures 11.43 45 show the same page, with frame borders turned off in Figure 11.44, and a border width of 10 in Figure 11.45.
To set border options:
Tips
To choose a border color:
The color you selected will be displayed on the frame borders (Figure 11.46); the appearance will differ depending on border width.
Tips
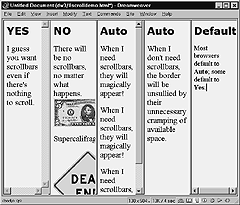
Figure 11.41 Scrollbar options demonstrated here are, from left to right, Yes, No, Auto (with scrollbars), Auto (without scrollbars), and Default. Obviously, Auto makes the most sense most of the time.

Figure 11.42 Choose one of the scrollbar options from the drop-down menu on the Properties inspector.
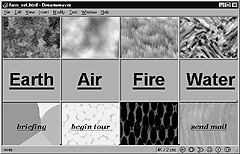
Figure 11.43 Here's the same page we saw in Figure 11.1, with a normal, default frame border. To change back to this setting after a departure, use a frame border of 5.
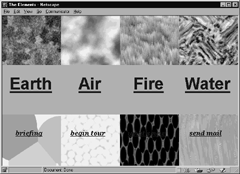
Figure 11.44 Here's the same page with a border width of zero.
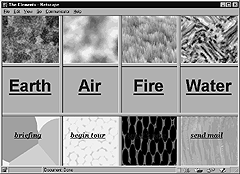
Figure 11.45 Same thing, with a rather thick border of 10. Play around with it; the most interesting effects are between 0 and 10.
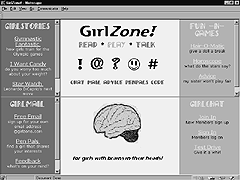
Figure 11.46 This frameset has colored borders and a border width of 3.

Figure 11.47 I changed the border color setting only for the top-left frame, and all the borders were affected except the border between the middle and right frames.
Before Dynamic HTML, the only way to set page margins was by using frames. You can set two border values for each frame in a set: Margin Width (left and right margins) and Margin Height (top and bottom margins).
To set margins:
Figure 11.48 demonstrates the effect that margins can have. In Dreamweaver 3, the upper-left corner of the grid, also called the zero point, actually moves in relation to the upper-left corner of the frame. This is a more accurate and useful depiction of the placement of the content of a frame than in earlier editions of the program. For more about the grid, see Chapter 1. See Chapter 10 to use style sheets to set other kinds of margins.
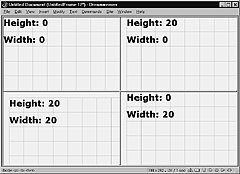
Figure 11.48 I turned on the grid in the view (View > Grid > Show) so that you could see the differences that margin settings make. Each of these four frames has different margin settings. Experiment with different settings for pages that use images or different sizes of text.
Now you have a frames page that looks exactly like you want it to, and you have a default document attached to all the frames in your page. Before you can call your page finished, you need to set targets for the links in your pages.
When you click on a link in a regular Web page, it generally opens in the same window as the last document you were viewing. In a frames page, however, in which several documents occupy the same window, you don't always want the result of the user's next click--the target page--to appear in the same frame as the link they clicked on. A target tells the link in which frame it should open.
You can set targets so that when you click on a link in a frame, the link opens either in a particular frame in the frameset, or in a specialized target option such as a new window.
Naming Frames
Before you can set targets, you need to name each frame. A frame name is different from a filename or a page title. The frameset page needs to know both the filename and the frame name of each page in order to be able to load the pages in the proper position and order.
Tip
To name a frame:
When you open the Frames inspector, the names of the frames will be displayed there (Figure 11.50).
Tips
Setting Targets
Once you name your frames, you can set a target for an entire frame or for individual links.
Setting a base target for a frame
By default, the target for each frame is the frame itself. To set a different default target, also known as a base target, you need to specify the name of the target in the code.
To set a base target:
<head>
<title>Untitled Document</title>
<meta http-equiv="Content-Type" content="text/html; charset=iso-8859-1">
</head>
<head>
<title>Untitled Document</title>
<base target="main_frame">
<meta http-equiv="Content-Type" content="text/html; charset=iso-8859-1">
</head>
While behind-the-scenes changes like this one won't show up visibly in the Dreamweaver window, you can preview your frames page in the browser window and test them to make sure they work. When you want to set a target for a link that differs from the default, or base target, use the Properties inspector to select a target for the link.
To target individual links:
1. Select the text or image that you want to target. The Properties inspector will display properties for that object.
2. If there's not a link specified for that object as yet, type or paste the URL for the link in the Link text box.
3. From the Target drop-down menu (Figure 11.51), select a target. This can be either the name of one of the other frames on the page, or one of the special targets discussed in Target Options, earlier in this chapter.
You're all set.
Figures 11.52 and 53 demonstrate a simple, common use of targeting: click on a link in the top frame, and it opens in the bottom frame.
Testing Your Targets
It's vitally important, more so than with almost any other kind of Web page, that you test every link on your frames-based pages. You need to make sure that the links open where you think you told them to open. Targets can be tricky--they don't need to be difficult, but they absolutely must be done correctly if you don't want to drive your visitors away for good. Figure 11.54 shows the evil recursive frame problem: a link to the entire frameset was accidentally targeted to open in one of the frames.
Specialized Targets
In addition to targeting links to open in a specific frame, you can set targets that will control which window the pages will appear in.
![]()
Figure 11.49 Name each frame by selecting it and then typing a meaningful word in the Frame Name text box.
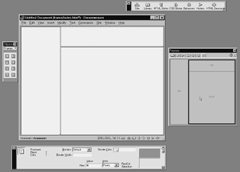
Figure 11.50 Name each frame by selecting it and then typing a meaningful word in the Frame Name text box.

Figure 11.51 Select the desired target from the Target drop-down menu.

Figure 11.52 Here's what you'll see when you first visit numbers.html: two frames introducing you to the site.

Figure 11.53 Click on one of the numbers in the top frame, and a new page opens in the bottom frame. The top frame has a base target of body, which is the name of the bottom frame.

Figure 11.54 A misplaced target can be ugly, at best. Here, we see a recursive frameset--a link to the entire frameset was accidentally targeted to open in the top, center frame.
Not everyone who visits your site will have a frames-capable browser. While most people are using some version or other of Netscape Navigator or Internet Explorer, not everyone is. See Appendix C on the Web site for the details. The point is that if you don't offer your non-frames visitors something, they won't see anything at all.
At the very least, you need to leave a message that says something like, "This site requires a frames-capable browser, such as Netscape Navigator 2 or later, or Internet Explorer 3 or later." Providing links to a site where they can download this software is also a good idea.
But even that is shortchanging your guests, in a way. Without much work at all, you can give them a fully functional page that will connect them with much of the same information.
To create a no-frames page from scratch:
Figure 11.56 shows the no-frames page we created as the alternative to the frames-based page shown in Figures 11.52 and 53.
To return to the frames view, just select Modify > Frameset > Edit No Frames Content again.
To use existing code in a no-frames page:
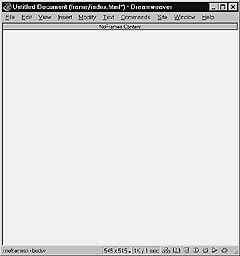
Figure 11.55 From the Document window menu bar, select Modify > Frameset > Edit No Frames Content, and the Document window will display the blank no-frames page.

Figure 11.56 With very little effort, I created a no-frames page
that includes all the same links as the frameset page. To appease very old browsers,
I also avoided frills like tables, background images, and image maps. See Appendix
C on the book's Web site for more details.
No-Frames Tips
Check to make sure that:
When you preview no-frames content in your regular browser, it won't show up. Why? Because your regular browser is probably frames-capable, and it will load the frames-based page instead--they are the same document, after all.
See Appendix C, on the Web site, for information about getting and using a non-frames browser for previewing your documents.
Internet Explorer (IE) has introduced a proprietary tag called <IFRAME> to make frames appear within a page (Figure 11.57). This technique, called inline frames or floating frames, only works with Internet Explorer version 3 or later.
To use inline frames:
You'll need to view this page in IE to see the iframe.
This is the code for the iframe in Figure 11.57:
<IFRAME name="toc" src="toctoc.html" frameborder=1 height="80%" width=200 scrolling=yes align=center, bottom> You must use Internet Explorer to view the inline frames on this page, but you can get the same content <a href="toctoc.html">here</a>. </IFRAME>
Tip

Figure 11.57 The inline frame is a particular feature of Internet Explorer--you'll need to experiment with the IFRAME attributes quite a bit to figure out how they work.
Other IFRAME Attributes
You can adjust the appearance and behavior of an IFRAME by using these other attributes within an IFRAME tag. You should recognize most of these attributes from this and other chapters. As always, the pipe (|) means "or."
name="name" align=top|middle|bottom|left|right| center (pick two, as in align="top, center")
This has more to do with the relationship between the frame and the other content than with the position of the frame.
frameborder=1|0 (1=yes, 0=no) height=x|"x%" width=x|"x%" marginheight=x marginwidth=x scrolling=yes|no|auto>