Online Appendix E: Additional List Properties
To Change Bulleted List Properties
- Create your bulleted list by selecting the text for at least two items,
and then clicking on the unordered List button on the Properties inspector.
To select a list you've already created, click within the list. (Don't
select the entire list, or the next step will be grayed out.)
- From the Document window menu bar, select Text >List> Properties. The List
Properties dialog box will appear (Figure 2).
- To choose the type of bullets you wish to use, select Bullet, Circle, or
Square from the Style drop-down menu (Figure 3). The bullet styles
are shown in Figure 4.
- Click on OK to close the List Properties dialog box and return to the Document
window.
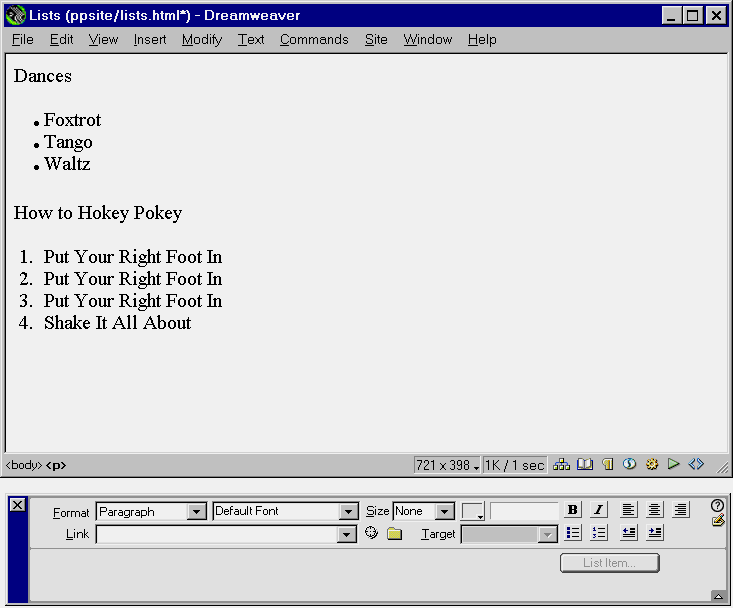
Fig. 1 Standard bullets, standard numbers.
You can create a bulleted (unordered) list or a numbered (ordered) list using
the Properties inspector.
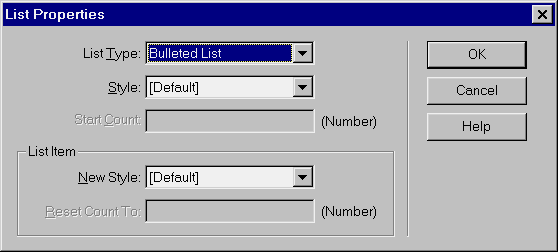
Fig. 2 The List Properties dialog box.
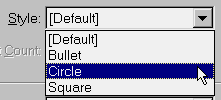
Fig. 3 Select a bullet style from the drop-down
menu.
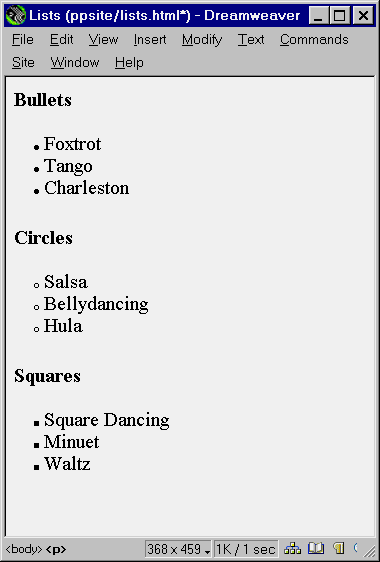
Fig. 4 The bullet styles are Bullet, Circle,
and Square.
To Change Numbered List Properties
- Create your numbered list by selecting the text for at least two items,
and then clicking on the Ordered List button on the Properties inspector.
To select a list you've already created, click within the list. (Don't
select the entire list, or the next step will be grayed out.)
- From the Document window menu bar, select Text > List > Properties. The
List Properties dialog box will appear (Figure 5).
- To choose the type of numbers you wish to use, select Number, Roman Small,
Roman Large, Alphabet Small, or Alphabet Large from the Style drop-down menu
(Figure 6). These number styles are shown in Figure 7.
- Click on OK to close the List Properties dialog box and return to the Document
window.
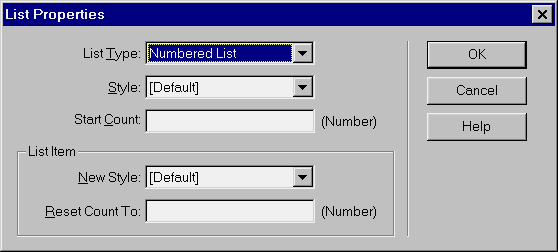
Fig. 5 Standard bullets, standard numbers.
You can create a bulleted (unordered) list or a numbered (ordered) list using
the Properties inspector.
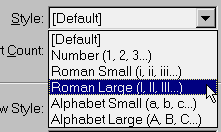
Fig. 6 The List Properties dialog box.

Fig. 7 Select a bullet style from the drop-down
menu.
Renumbering Lists
You can start a list, insert another kind of paragraph or another list in the
middle, and then restart the numbering.
Tip
You may need to use the HTML inspector to open and close the list tage where
you want them to open and close. Numbered lists open as <OL> and close
as </OL>. Bullet lists open as <UL> and close as </UL>. The
list item tag for both kinds of lists is <LI>.
To restart list numbering:
- Create your outline. In Figure 8, I've created three separate numbered
lists, each numbered 1. Between each list is an ordered list.
- Click on the list item whose numbering you want to change.
- From the Document window menu bar, select Text > List > Properties. The
List Properties dialog box will appear.
- In the Start Count text box, type the number you want your list item to
have (Figure 9). You can type digits (2,3, etc.) for any list style
(such as Roman or Alpha).
- Click on OK to close the List Properties dialog box.
- Repeat steps 2 - 5 for any other nonconsecutive list items.
Figure 10 shows the results.
Tips
- In Figure 11, I clicked within a bulleted list, changed the list type to
ordered, and then changed the number style to Small Roman. You can create
multi-level outlines this way. To add indenting, use the Indent button on
the Properties inspector. This adds the lt;BLOCKQUOTE> tag, which you can
nest to create multiple levels of indent.
- You can use a different style on a single list item, either bulleted or
numbered. Click within the list item you want to single out, and in the List
Properties dialog box, select a style from the New Style drop-down menu. You
can change the numbering for a single item by typing a number in the Reset
Count To text box.
- The other two types of lists in the List Type drop-down menu are Directory
List <DIR> and Menu List <MENU>. These tage both display the same
as a bulleted, or unordered, list. Both tags are being deprecated, or retired,
in favor of the <UL> tag.
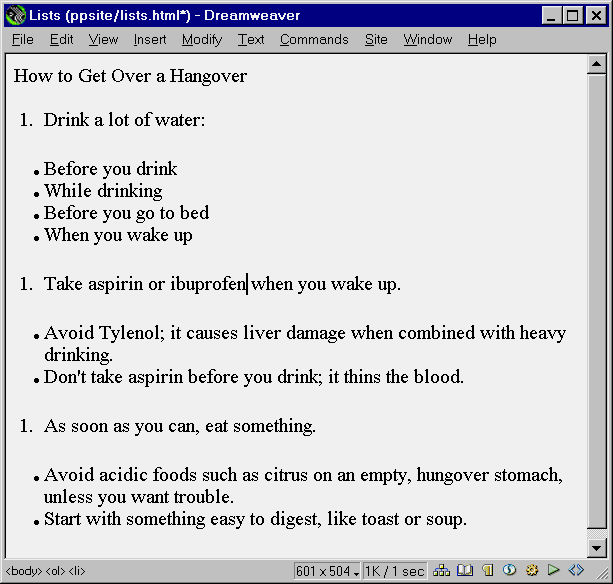
Fig. 8 In setting up my page to create an outline,
I've created three separate ordered lists and three separate unordered lists.
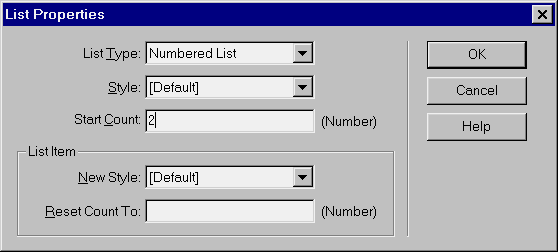
Fig. 9 To restart numbering, type a digit in
the Start Count text box.
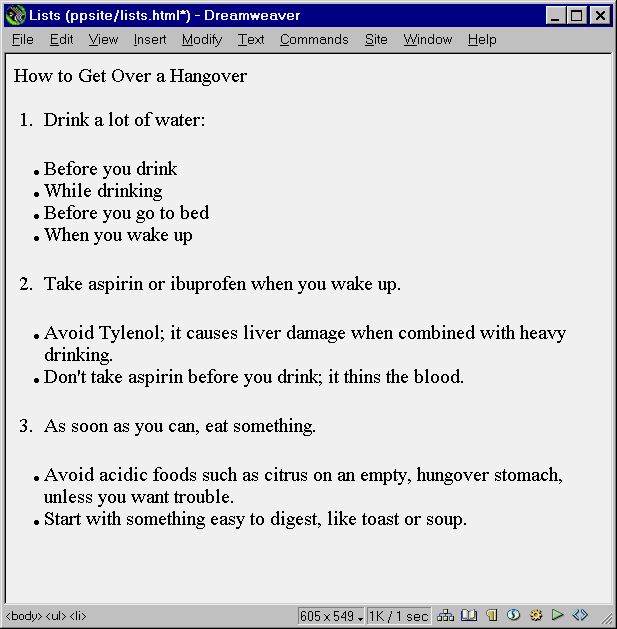
Fig. 10 I selected each place where I wanted
the numbering to restart, and then set the numbers using the List Properties dialog
box.
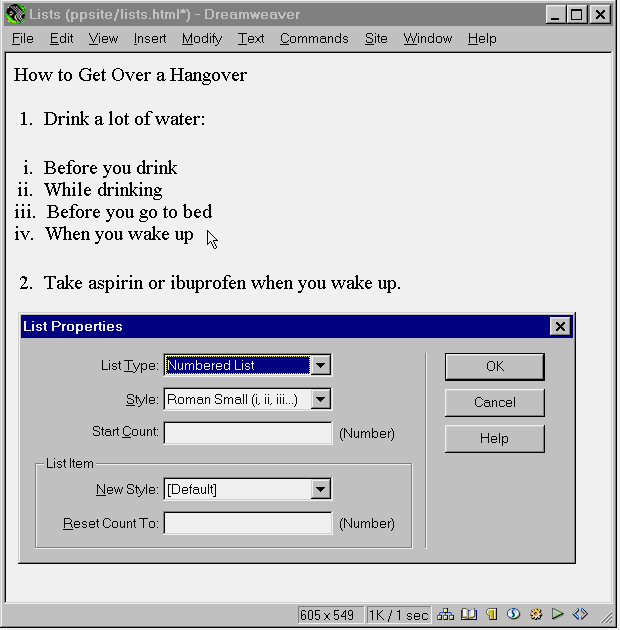
Fig. 11 You can create multiple outline levels
by nesting numbered lists and using different styles.


